
Want to make your own garden flag? You absolutely can! Sewing garden flags is a fun and rewarding craft that lets you add a personal touch to your outdoor space. This guide will show you how to create beautiful DIY garden flag projects, even if you’re new to sewing. We’ll cover everything from choosing materials to finishing touches.
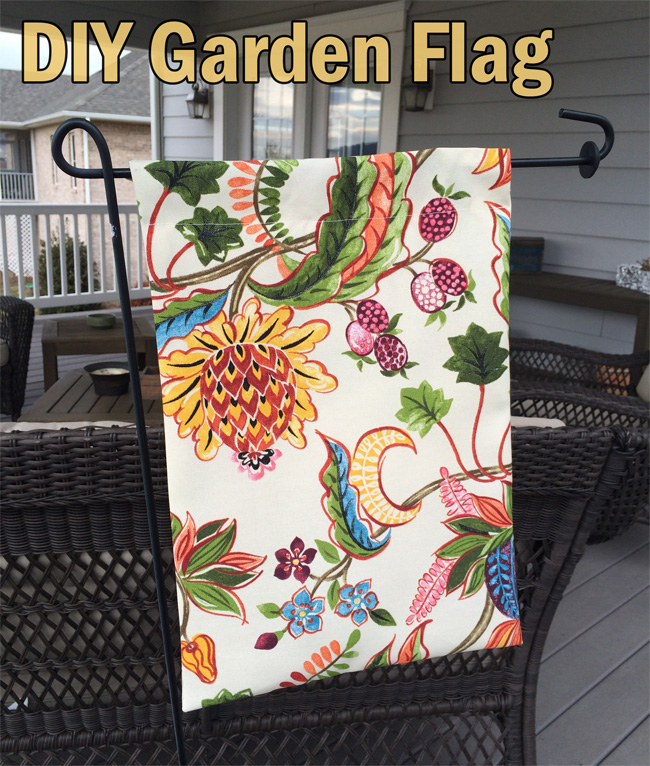
Image Source: takethemameal.com
Why Make Your Own Garden Flags?
Creating your own garden flags offers a world of creative possibilities. You can design them to match your garden’s theme, celebrate holidays, or showcase your favorite colors and patterns. Plus, using outdoor fabric flags means your creations will withstand the elements.
Benefits of DIY Garden Flags:
- Personalization: Make personalized garden flags that truly reflect your style.
- Cost-Effective: Often cheaper than buying custom-made flags.
- Creativity: Unleash your inner artist with unique designs.
- Skill Building: Learn or practice sewing techniques.
- Unique Gifts: Beautiful, handmade gifts for friends and family.
Gathering Your Supplies
Before you start flag making tutorial, gather everything you need. Having all your supplies ready makes the process smoother.
Essential Materials:
- Outdoor Fabric: Choose a durable fabric that can handle sun and rain.
- Types: Polyester, nylon, or treated cotton blends are excellent choices for outdoor fabric flags. Look for fabrics labeled “outdoor” or “water-resistant.”
- Weight: A medium-weight fabric is ideal. It’s sturdy enough to hold its shape but easy to work with.
- Thread: Use a strong, weather-resistant thread. Polyester or nylon thread is recommended.
- Sewing Machine: A basic sewing machine for flags will make the job much easier and faster.
- Scissors: Sharp fabric scissors are a must.
- Iron and Ironing Board: For pressing seams.
- Measuring Tape or Ruler: For accurate cutting.
- Pins: To hold fabric in place.
- Optional Embellishments: Fabric paint, stencils, appliqué pieces, vinyl transfers.
- Grommets and Grommet Tool: If you want to hang your flag with grommets.
- Dowel or Flagpole: To display your finished flag.
Choosing Your Fabric: A Closer Look
The fabric is key to a long-lasting garden flag.
| Fabric Type | Pros | Cons | Best For |
|---|---|---|---|
| Polyester | Durable, fade-resistant, water-repellent | Can be a bit stiff, may pill over time | Most general garden flags |
| Nylon | Very strong, lightweight, water-resistant | Can be prone to UV damage if not treated | Flags needing flexibility, like banners |
| Treated Cotton | Soft feel, good color vibrancy | Less durable than synthetics, may fade | Decorative flags, short-term use |
| Vinyl-Coated Polyester | Highly waterproof, very durable | Can be stiff, heavier, harder to sew | Flags in very wet or harsh climates |
Designing Your Garden Flag
This is where your creativity shines! You can keep it simple or go all out with intricate designs.
Simple Designs:
- Solid Color: Choose a vibrant color that stands out.
- Stripes or Color Blocks: Use contrasting colors for a bold look.
- Monogram: Add a single initial for a touch of elegance.
Elaborate Designs:
- Appliqué: Cut shapes from other fabrics and sew them onto the main flag.
- Fabric Paint/Stencils: Create patterns or images using fabric paints.
- Heat Transfer Vinyl (HTV): Cut designs from HTV and iron them onto the fabric. This is great for lettering and detailed graphics.
- Photo Transfer: Print a photo onto special transfer paper and iron it onto your flag.
Creating Flag Design Patterns:
You can find many flag design patterns online for free or purchase them. You can also sketch your own ideas directly onto paper.
- Sketch Your Idea: Draw your design on paper. Consider the size of your flag. Standard garden flag sizes are often around 12 inches by 18 inches, but you can adjust this.
- Transfer to Fabric (Optional): For complex designs, you might want to trace or draw parts of your design onto the fabric using a fabric marker or chalk.
- Prepare Appliqué/Cutouts: If using appliqué, cut out your shapes from contrasting fabrics.
Step-by-Step Sewing Guide
Let’s get sewing! This guide assumes a basic rectangular flag.
Step 1: Cut Your Fabric
- Determine Size: Decide on the finished size of your flag. A common size is 12 inches wide by 18 inches tall.
- Add Seam Allowance: You’ll need to add extra fabric for the hems. A 1-inch seam allowance on all sides is usually sufficient.
- For a 12″ x 18″ finished flag, cut two pieces of fabric measuring 14 inches wide by 20 inches tall. This gives you 1 inch for the side hems and 1 inch for the top and bottom hems.
- Cut Accurately: Use sharp scissors and a ruler to cut your fabric pieces precisely.
Step 2: Prepare for Hemming
Hemming is crucial for a neat finish and to prevent fraying. We’ll be hemming garden flags to create a clean edge.
- Press Fabric Edges: On each of the four raw edges of one fabric piece (this will be your front flag piece), fold the edge over by 1/2 inch towards the wrong side of the fabric. Press with an iron.
- Fold Again: Fold that same edge over again by another 1/2 inch to enclose the raw edge. Press firmly. This creates a double-fold hem.
- Repeat for All Edges: Do this for all four sides of your front flag piece.
Tip: If you’re using a sturdy outdoor fabric, you might opt for a single fold hem if your fabric doesn’t fray much, but a double fold is always more secure.
Step 3: Add Decorations (If Any)
If you’re adding appliqués, fabric paint, or HTV, do it before sewing the two pieces together.
- Appliqué: Position your fabric cutouts on the right side of the front flag piece. Pin them in place. You can sew them on now using a straight stitch or a zigzag stitch close to the edge.
- Fabric Paint/Stencils: Apply paint or use stencils on the right side of the front flag piece. Let it dry completely according to the product instructions.
- HTV: Follow the manufacturer’s instructions for applying your heat transfer vinyl. Ensure it’s properly adhered before proceeding.
Step 4: Sew the Flag Together
Now you’ll sew the front and back pieces together.
- Place Fabric Pieces: Lay one fabric piece (the back piece) right side up. Place the decorated front piece (with hems pressed) right side down on top of it. The edges should align perfectly.
- Pin Securely: Pin all around the edges, making sure the pressed hems of the front piece don’t unfold.
- Sew the Sides and Top: Using your sewing machine for flags, sew around the three edges (two sides and the top) with a 1/2-inch seam allowance. Backstitch at the beginning and end of your stitching for extra strength.
- Leave the Bottom Open: Crucially, leave the bottom edge completely open. This is where the flag will slide onto the pole or dowel.
- Taper Corners (Optional): For slightly sharper corners, you can trim a small triangle off each sewn corner, being careful not to cut the stitching. This helps the corners lie flatter when turned right side out.
Step 5: Create the Pole Pocket (Hemming the Bottom)
This is how your flag will attach to a pole.
- Turn Right Side Out: Gently turn the flag right side out through the open bottom edge. Use a point turner or a chopstick to poke out the corners neatly.
- Press: Press the flag, paying attention to the seams.
- Create the Pocket:
- On the open bottom edge, fold the raw fabric edge up by 1/2 inch towards the inside of the flag. Press.
- Now, fold this edge up again by approximately 1 1/2 to 2 inches (depending on the diameter of your flagpole or dowel). This creates a pocket for the pole. Press very firmly.
- Pin this folded edge in place along the bottom.
- Sew the Pocket: Using your sewing machine, stitch along the top folded edge of the pocket, close to the fold. This secures the pocket. Again, backstitch at the start and end.
Step 6: Add Grommets (Optional)
If you prefer to hang your flag with grommets for a more traditional look, you can add them to the top edge instead of, or in addition to, a pole pocket.
- Reinforce the Top Edge: Before sewing the flag together (Step 4), you can reinforce the top edge where you plan to place grommets. Fold the top edge over by 1 inch, press, and then fold again by 1 inch. Stitch this hem down. This double hem will provide a sturdy place for grommets.
- Mark Grommet Placement: Decide how many grommets you want (usually two) and mark their positions evenly spaced along the reinforced top edge.
- Using Grommets and a Grommet Tool:
- Place the grommet setter tool on a flat, hard surface (like a piece of scrap wood).
- Place one half of the grommet on the tool.
- Insert the fabric edge into the grommet, ensuring the fabric is centered within the grommet’s ring.
- Place the other half of the grommet over the fabric.
- Use the setter punch tool and a hammer to firmly strike the top of the setter, joining the two halves of the grommet and creating a hole. Repeat for the second grommet.
Important Note on Grommets: If you’re adding grommets to a flag that also has a pole pocket, place the grommets above the pocket seam.
Caring for Your Garden Flags
To ensure your outdoor fabric flags look great season after season, follow these care tips.
- Cleaning: Most flags can be spot-cleaned with mild soap and water. For a deeper clean, gently hand wash in cool water and mild detergent. Rinse thoroughly.
- Drying: Hang the flag to air dry. Avoid high heat from dryers, which can damage the fabric.
- Storage: In harsh weather (heavy snow, high winds, prolonged sun), consider taking your flag down to protect it. Store it indoors in a dry place.
Advanced Techniques & Customization
Want to take your sewing garden flags skills to the next level?
Layered Appliqué:
Create depth by layering different fabric shapes. For example, cut petals for a flower from various shades of pink and sew them one on top of another.
Quilted Details:
Add decorative stitching (quilting) to your flag. This can add texture and visual interest, especially to plain fabric flags. Use a free-motion quilting foot on your sewing machine for flags if you have one.
Bias Tape Edging:
Instead of a double-folded hem, you can finish the edges with bias tape. This gives a very professional and colorful finish.
Making Custom Garden Flags:
To create truly custom garden flags, consider these points:
- Theme Consistency: If your garden has a specific theme (e.g., nautical, floral, whimsical), design your flag to match.
- Color Palette: Choose colors that complement your garden’s existing colors.
- Size and Placement: Think about where the flag will be placed and how large it needs to be to be visible.
Troubleshooting Common Issues
Even experienced sewers can run into snags. Here are some common problems and solutions when sewing garden flags.
Fabric Puckering:
- Cause: Thread tension too tight, needle too dull, or fabric not feeding smoothly.
- Solution: Check your sewing machine’s tension settings. Use a new, sharp needle appropriate for your fabric weight. Ensure you’re not pulling the fabric as you sew.
Uneven Stitches:
- Cause: Incorrect thread or needle combination, or inconsistent sewing speed.
- Solution: Ensure your thread and needle are compatible. Try a different thread weight or needle size. Practice maintaining a steady sewing speed.
Fraying Edges:
- Cause: Insufficient hemming or fabric that frays easily.
- Solution: Always use a double-fold hem or a serger for a clean edge. If using a fabric that frays badly, consider using pinking shears for the initial cut or sewing a zigzag stitch along the raw edge before hemming.
Grommets Won’t Set Properly:
- Cause: Insufficient force, wrong tool placement, or fabric too thick.
- Solution: Ensure you are using a firm, flat surface underneath and striking the setter tool with enough force. Double-check that the grommet halves are correctly aligned before hammering.
Frequently Asked Questions (FAQ)
Q: What is the best fabric for sewing garden flags?
A: The best fabrics are durable, weather-resistant synthetics like polyester or nylon blends designed for outdoor use. They resist fading and moisture.
Q: Can I use a regular sewing machine for garden flags?
A: Yes, a standard home sewing machine for flags is perfectly capable of sewing garden flags, especially with outdoor-rated thread.
Q: How do I make the lettering on my garden flag look neat?
A: For neat lettering, consider using iron-on vinyl (HTV) cut with a Cricut or similar machine, fabric markers with stencils, or appliqué letters.
Q: My flag looks a bit limp. How can I make it stiffer?
A: Use a heavier weight outdoor fabric, or consider adding interfacing to the back of the flag before sewing the pieces together. Some fusible interfacings are designed for outdoor use.
Q: What size should my garden flag be?
A: Standard garden flags are typically 12 inches wide by 18 inches tall, but you can make them any size you like. Just ensure your fabric and pole accommodate the dimensions.
Q: How do I ensure my colors don’t fade in the sun?
A: Choose fabrics specifically treated for UV resistance, or use fabric paints and inks that are labeled as fade-resistant for outdoor use.
Q: Can I create a reversible garden flag?
A: Absolutely! Simply cut two identical pieces, decorate one or both as desired, place them right sides together, and sew around the edges, leaving an opening to turn. Then, stitch the opening closed and create your pole pocket or add grommets.
Q: What is the easiest way to add a design to my garden flag?
A: For beginners, a simple solid color flag with a basic folded hem is easiest. For adding a design, appliqué shapes or stenciled patterns are relatively straightforward. Iron-on vinyl is also a popular and easy option.
Q: How do I attach the flag to the pole?
A: Most garden flags have a top pole pocket sewn into the bottom edge, allowing the flag to slide onto the pole. Alternatively, grommets can be used with clips or ties to attach the flag to a pole.
By following this comprehensive guide, you’re well on your way to creating beautiful, personalized garden flags that will add charm and personality to your outdoor space for years to come. Happy sewing!