
Can you restore old, worn-out leather at home? Yes, you can! With the right tools and a little patience, you can bring life back to your cherished leather items, whether it’s a beloved armchair, your car’s interior, or even a favorite pair of boots. This guide will walk you through the simple DIY steps to achieve fantastic results.
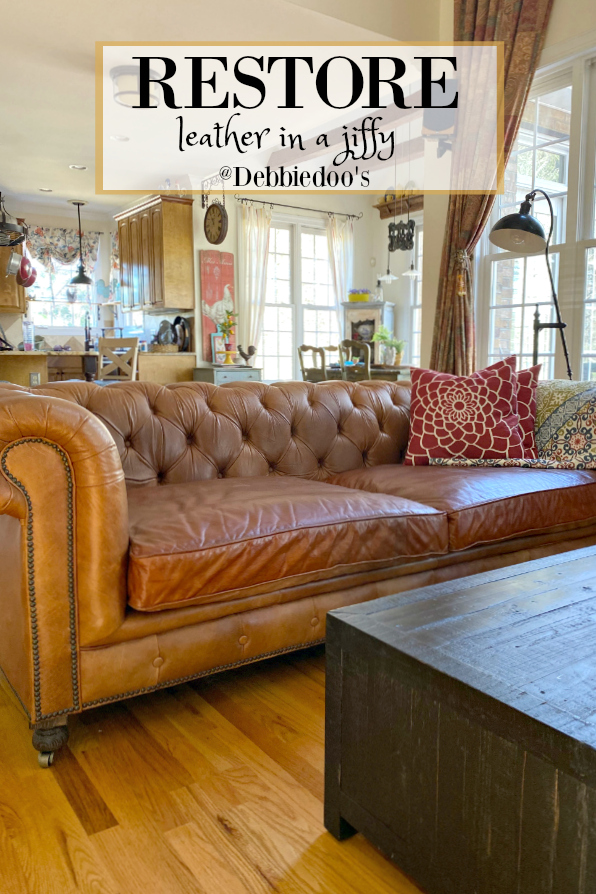
Image Source: cdn.debbie-debbiedoos.com
Reviving Your Leather: A Comprehensive Guide
Leather is a beautiful and durable material, but over time, it can show signs of wear and tear. Think dry patches, cracks, fading, and stains. The good news is that with proper leather care products and a bit of elbow grease, you can effectively reverse much of this damage. This guide focuses on practical leather repair techniques you can perform yourself, transforming your tired leather items into something you’ll be proud of again.
Step 1: Thorough Leather Cleaning
Before any repair or restoration can happen, a deep leather cleaning is essential. This removes dirt, grime, oils, and old product buildup that can prevent new treatments from working effectively.
Preparing for Cleaning
Gather your supplies:
- Two Buckets: One for the cleaning solution, one for rinsing.
- Soft Cloths: Microfiber cloths are ideal. Have several on hand.
- Soft Bristle Brush: A dedicated leather brush or a soft toothbrush.
- Mild Leather Cleaner: Look for pH-neutral cleaners specifically designed for leather. Avoid harsh household cleaners, as they can strip natural oils and damage the finish.
- Distilled Water: If your cleaner requires dilution.
- Leather Protection: A leather conditioner or protector to apply afterward.
The Cleaning Process
- Test in an Inconspicuous Area: Always test your cleaner on a small, hidden spot (like the underside of a seat cushion or the inside of a bag strap) to ensure it doesn’t cause discoloration or damage. Wait for it to dry completely before proceeding.
- Mix the Cleaning Solution: Follow the manufacturer’s instructions for your chosen leather cleaner. Some may be ready to use, while others need to be diluted with distilled water.
- Apply the Cleaner: Dip a soft cloth into the cleaning solution, wring it out thoroughly so it’s damp, not wet. Gently wipe the leather surface in a circular motion. Work in small sections.
- Use the Brush for Stubborn Dirt: For textured leather or areas with ingrained dirt, use the soft bristle brush. Apply a small amount of cleaner to the brush and gently scrub the affected areas.
- Wipe Away Residue: Use a clean, damp cloth (rinsed in plain distilled water and wrung out well) to wipe away the cleaning solution and lifted dirt.
- Dry the Leather: Immediately after cleaning, use a dry, soft cloth to gently pat the surface dry. Allow the leather to air dry completely. Avoid using heat sources like hairdryers, as this can dry out the leather too much.
Step 2: Assessing Leather Damage and Choosing Your Repair
Once your leather is clean and dry, it’s time to inspect it closely. This assessment will dictate the type of leather repair needed.
Common Leather Issues
- Dryness and Cracking: Often seen on high-use areas like armrests or seat edges. This indicates a lack of moisture.
- Scratches: Surface scratches can often be buffed out, while deeper ones might need filling.
- Stains: Different stains require different treatments. Oil stains, ink stains, and dye transfer are common.
- Fading: Prolonged exposure to sunlight can cause the color to fade.
- Tears and Punctures: More severe damage that may require patching or specialized fillers.
Repair Options
- Leather Conditioner: For general dryness and minor surface cracks.
- Leather Filler/Balm: For deeper scratches, scuffs, and small holes.
- Leather Dye: To restore faded color or cover minor discoloration.
- Leather Patching Kits: For tears or punctures.
- Leather Recoloring Kits: For more extensive color restoration or changing the color.
Step 3: Leather Conditioning – The Foundation of Restoration
Leather conditioning is crucial for maintaining flexibility and preventing future cracking. It replenishes the natural oils that leather loses over time.
How to Condition Leather
- Choose the Right Conditioner: Select a high-quality leather conditioner. Natural oils like lanolin, mink oil, or neatsfoot oil are beneficial, but ensure the product is suitable for the type of leather you have (e.g., aniline, semi-aniline, pigmented).
- Apply Generously (But Evenly): Apply a small amount of conditioner to a clean, soft cloth. Work it into the leather using gentle, circular motions. Ensure you cover the entire surface, paying attention to dry or cracked areas.
- Allow to Soak In: Let the conditioner penetrate the leather for at least 15-30 minutes, or as per the product’s instructions. For very dry leather, you might leave it for a few hours or even overnight.
- Buff Off Excess: Use a clean, dry cloth to gently buff away any excess conditioner. This will also help to bring out a natural sheen.
Table: Leather Conditioning Frequency
| Leather Type | Recommended Conditioning Frequency |
|---|---|
| Aniline Leather | Every 6-12 months |
| Semi-Aniline | Every 6-12 months |
| Pigmented/Finished | Every 12-24 months |
| High-Use Areas | More frequently (as needed) |
Step 4: Addressing Scratches and Cracks
Minor surface scratches can often be dealt with using just a good conditioner and buffing. For deeper issues, you’ll need more targeted DIY leather repair.
Minor Scratches
- Apply leather conditioner to the scratch with a soft cloth.
- Gently rub the conditioner into the scratch using a circular motion.
- Allow it to soak in.
- Buff the area with a clean, dry cloth. The oils can often help to “fill” and blend the scratch.
Deeper Scratches and Cracks
For more significant damage, a leather filler or repair compound is necessary.
- Clean the Area: Ensure the damaged area is clean and dry.
- Apply Leather Filler: Using a small spatula or applicator (often included with the product), gently apply a thin layer of leather filler into the scratch or crack.
- Smooth and Level: Try to smooth the filler so it’s level with the surrounding leather surface.
- Drying: Allow the filler to dry completely. This can take several hours. You may need to apply multiple thin layers for deeper damage, allowing each to dry.
- Sanding (Optional but Recommended): Once dry, you can very gently sand the repaired area with very fine-grit sandpaper (e.g., 1000 grit or higher) to ensure it’s perfectly smooth and flush with the leather. Wipe away any dust.
Step 5: Leather Dyeing for Color Restoration
If your leather has faded or has minor discoloration that isn’t fixed by cleaning and conditioning, leather dyeing can be a great solution.
Preparing for Dyeing
- Clean Thoroughly: As always, start with a clean, dry surface.
- Use a Leather Prep/Deglazer: This step is crucial for dye adhesion. Apply a leather preparer or degreaser to the surface you intend to dye. This removes any remaining oils or finishes that could prevent the dye from taking. Test in an inconspicuous area first.
- Mask Off Areas: Use painter’s tape to protect any areas you don’t want to dye (like stitching, metal hardware, or contrasting panels).
The Dyeing Process
- Choose Your Dye: Select a leather dye specifically designed for the type of leather you’re working with. Alcohol-based dyes penetrate quickly, while water-based dyes offer more working time.
- Apply the Dye:
- By Hand: Use a soft cloth or sponge applicator. Apply the dye in thin, even coats. Work in one direction for each coat, and then follow with perpendicular strokes to ensure even coverage.
- By Airbrush: For larger areas or a very smooth finish, an airbrush can be used. Dilute the dye according to the manufacturer’s instructions.
- Allow Drying Between Coats: Let each coat of dye dry completely before applying the next. This typically takes 15-30 minutes.
- Build Color Gradually: Apply multiple thin coats to achieve the desired depth of color rather than one thick, uneven coat.
- Sealing and Finishing: Once you’ve achieved the desired color and the final coat is dry, you’ll need to seal the dye. This often involves applying a leather finish or sealant. This protects the dye from rubbing off and provides a uniform sheen. Follow the product’s instructions for application and drying times.
Step 6: Leather Polishing for a Showroom Shine
Leather polishing can add a protective layer and a beautiful sheen to your restored leather. It’s the final touch that makes a significant difference.
When to Polish
- After conditioning.
- After dyeing and sealing.
- As a regular maintenance step to maintain shine and protection.
The Polishing Process
- Choose a Leather Polish or Cream: Select a product that matches your leather’s color or a neutral polish. Leather creams often contain conditioning agents as well as colorants and waxes.
- Apply Sparingly: Use a clean, soft cloth or a shoe dauber to apply a small amount of polish.
- Work it In: Gently rub the polish into the leather in a circular motion.
- Buff to a Shine: Allow the polish to dry for a few minutes (check product instructions), then use a clean, dry cloth or a horsehair brush to buff the leather to a high shine. For a deeper shine, you can often buff multiple times.
Step 7: Protecting Your Restored Leather
Once you’ve completed your leather treatment, protecting your hard work is key.
Application of Leather Protector
- Choose a Quality Protector: Select a protector spray or cream that is breathable and repels water and stains.
- Apply Evenly: Apply in a well-ventilated area. Hold the spray can about 6-8 inches away and apply in even, sweeping motions. For creams, use a soft cloth.
- Allow to Dry: Let the protector dry completely, which can take a few hours. Some products recommend a second light application after the first has dried.
Specialized Restoration Projects
Furniture Restoration
Restoring leather furniture often involves similar steps: deep cleaning, conditioning, and potentially repair of cracks or tears with fillers. For larger pieces, ensure you have ample space and ventilation. Working on one cushion or panel at a time can make the process more manageable.
Car Interior Repair
Car interiors can suffer from UV damage, leading to fading and cracking.
- Specialized Cleaners: Use automotive-specific leather cleaners and conditioners, as car interiors can have different finishes than furniture.
- UV Protection: Prioritize products with UV blockers to prevent future sun damage.
- Color Matching: For dyeing or recoloring, precise color matching is crucial for a seamless repair. You might need to use automotive color matching kits or consult a professional if the color is complex.
Important Considerations for DIY Leather Repair
- Know Your Leather Type: Different types of leather (aniline, semi-aniline, pigmented, suede, nubuck) require different products and techniques. Always identify your leather type before starting.
- Patience is Key: Rushing the process can lead to mistakes. Allow adequate drying time between steps.
- Ventilation: Always work in a well-ventilated area, especially when using dyes, cleaners, or sealants.
- Test, Test, Test: Before applying any product to the main surface, test it on an inconspicuous area.
Tools and Products You’ll Need
Here’s a summary of common leather care products and tools for your DIY leather repair journey:
Essential Supplies:
- Mild Leather Cleaner
- Leather Conditioner
- Soft Microfiber Cloths (multiple)
- Soft Bristle Brush
- Leather Filler/Balm (for deeper repairs)
- Leather Dye (optional, for color restoration)
- Leather Prep/Deglazer (if dyeing)
- Leather Finish/Sealant (if dyeing)
- Leather Polish/Cream
- Leather Protector Spray/Cream
- Painter’s Tape
- Small Spatulas or Applicators
- Fine-Grit Sandpaper (e.g., 1000+ grit)
Optional but Helpful:
- Hair Dryer (on cool setting, to speed drying slightly between thin coats of filler)
- Airbrush (for even dye application on large areas)
- Leather Colorant Kits
- Leather Patching Kits
Frequently Asked Questions (FAQ)
Q1: Can I really restore very old and cracked leather?
A1: Yes, to a significant extent. While extremely brittle or deteriorated leather might be beyond home repair, most dry and cracked leather can be improved greatly with deep conditioning and proper leather treatment. Multiple applications of conditioner over time will be necessary for severe dryness.
Q2: What’s the best way to remove ink stains from leather?
A2: For fresh ink stains, sometimes a damp cloth with a very mild soap can lift it. For set-in stains, specialized leather ink remover sticks or solutions are available. Always test these in a hidden spot first, as they can be aggressive. For significant ink damage, professional help might be needed.
Q3: How do I know if I should dye my leather or just use a color restorer?
A3: Color restorers are typically for minor fading or scuffs where the original color is mostly intact. If the color is significantly faded across a large area, or if you want to change the color, a dye is more appropriate. Dyes penetrate the leather, while some color restorers sit more on the surface.
Q4: Will a leather conditioner make my leather shiny?
A4: Most conditioners are designed to restore a natural, matte to satin finish. If you want a higher shine, you would use a leather polish or cream after conditioning.
Q5: How often should I condition my leather car seats?
A5: Car interiors are exposed to more environmental stress (sun, temperature changes). Aim to condition your car’s leather seats at least twice a year, or more often if you notice them looking dry or feeling stiff.
Q6: Can I use hairspray to remove dye transfer?
A6: Some people suggest hairspray for light dye transfer, but it’s a risky method that can damage the leather finish. It’s better to use a dedicated leather cleaner or a mild soap solution. For stubborn dye transfer, a specialized leather cleaner is recommended.
By following these detailed steps, you can confidently embark on your DIY leather repair and furniture restoration projects, breathing new life into your treasured leather items. Enjoy the satisfaction of a job well done!