
Can you program your Homelink system without the original remote? Yes, it is absolutely possible to program your Homelink system without the original remote opener, often referred to as Homelink programming without remote. This process typically involves using the learn button on your garage door opener motor unit itself, and it’s a common need when the original remote is lost, broken, or you simply want to establish a new Homelink setup without opener transmitter. This guide will walk you through the steps to achieve Homelink access without remote, making manual Homelink programming a breeze. We’ll explore alternative Homelink programming methods and how to get your Homelink garage door without remote working smoothly. If you’ve ever wondered about Homelink vehicle setup no remote, or how to reprogram Homelink without original remote, you’re in the right place.
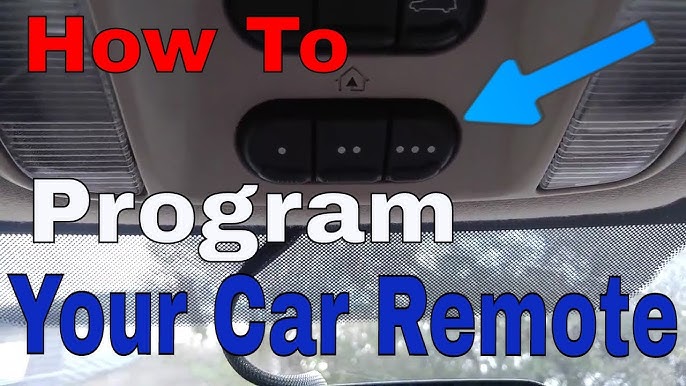
Image Source: i.ytimg.com
The Basics of Homelink and Your Garage Door Opener
Homelink is a built-in wireless control system found in millions of vehicles from various manufacturers. It allows you to open and close your garage door, activate driveway gates, and even turn on home lighting systems, all from the comfort of your car. It’s essentially a universal remote built into your vehicle’s sun visor, overhead console, or rearview mirror.
Your garage door opener system typically consists of a motor unit mounted in your garage and one or more remote transmitters. The motor unit receives signals from the remote and opens or closes the garage door. Homelink works by learning the radio frequency and code of your existing remote.
Why You Might Need to Program Homelink Without the Remote
There are several scenarios where you’ll need to learn how to program Homelink without remote:
- Lost Remote: The most common reason. If your original remote is lost, you can’t use it to program Homelink.
- Broken Remote: A damaged remote won’t transmit the necessary signal.
- New Garage Door Opener: When you install a new opener, you’ll need to program your Homelink to match.
- New Vehicle: If you buy a car with Homelink, you’ll need to program it for your garage.
- Security: If you want to clear old codes and ensure only your current remotes and Homelink are programmed.
- No Access to Original Remote: Perhaps you moved into a new home and the previous owner didn’t leave any remotes, or the existing ones are inaccessible.
Preparing for Homelink Programming Without the Remote
Before you begin the manual Homelink programming process, ensure you have the following:
- Your Vehicle: Make sure it’s parked in your garage or within range of the garage door opener motor unit.
- Your Garage Door Opener Motor Unit: You’ll need physical access to the “Learn” or “Program” button on the back or side of the unit.
- A Ladder (if needed): The motor unit is usually mounted on the ceiling.
- A Second Person (recommended): Having someone to press buttons can make the process smoother.
- The Vehicle Owner’s Manual: This is crucial as button locations and specific sequences can vary slightly between vehicle manufacturers and models. Look for the section on “Homelink” or “Garage Door Opener.”
- Your Garage Door Opener Remote (if available, even if not used directly): While the goal is to program without the remote initially, having it can sometimes be helpful for certain opener types or troubleshooting.
Locating the “Learn” Button on Your Garage Door Opener
This is a critical step for Homelink programming without remote. The “Learn” or “Program” button is a small, often colored button (red, orange, purple, green, or yellow) located on the back or side of your garage door opener motor unit.
Here’s how to find it:
- Look on the back or side: Open the light cover of your motor unit. The learn button is almost always found there, along with other wiring terminals.
- Check the casing: Sometimes it’s on the side of the motor unit itself, not just under the light cover.
- Consult your opener’s manual: If you can’t find it, your garage door opener’s manual will have a diagram and specific location. You can also often find this information online by searching for your opener’s brand and model number.
Common Opener Brands and Learn Button Locations:
| Opener Brand | Typical Learn Button Location |
|---|---|
| LiftMaster | Back or side of the motor unit, under the light cover. Often RED or ORANGE. |
| Chamberlain | Back or side of the motor unit, under the light cover. Often PURPLE or GREEN. |
| Craftsman | Back or side of the motor unit, under the light cover. Often RED or ORANGE. |
| Genie | Side of the motor unit, near the terminal for the wall button. Often PURPLE or GREEN. |
| Overhead Door | Similar to LiftMaster/Chamberlain. Often RED or ORANGE. |
| Sommer | Usually a specific programming button or sequence. |
Note: The color of the learn button often indicates the frequency and rolling code technology used by your opener. This information might be helpful for advanced troubleshooting.
Step-by-Step Guide: Programming Homelink Without the Original Remote
This method involves directly syncing your vehicle’s Homelink system with the garage door opener motor unit. This is often the most direct way to achieve Homelink door opener without remote functionality.
Phase 1: Clearing Existing Homelink Codes
Before you program a new garage door opener, it’s a good practice to clear any previously programmed codes from your Homelink system. This prevents interference and ensures a clean start.
- Ignition ON: Turn your vehicle’s ignition switch to the ON/ACCESSORY position (you don’t need to start the engine).
- Locate Homelink Buttons: Identify the Homelink buttons, usually located on your rearview mirror, overhead console, or visor.
- Press and Hold: Press and hold the two outer Homelink buttons (usually button 1 and button 3) simultaneously.
- Observe the Indicator Light: Continue holding until the Homelink indicator light changes from a slow flash to a rapid flash. This typically takes about 10-20 seconds.
- Release Buttons: Release both buttons. All previously learned codes are now cleared.
Phase 2: Programming a New Code
This is where you’ll directly interact with your garage door opener motor unit.
- Ignition ON: Ensure your vehicle’s ignition is in the ON/ACCESSORY position.
- Select a Homelink Button: Choose which Homelink button you want to program for your garage door opener.
- Position Your Vehicle: Park your vehicle within a few feet of the garage door opener motor unit.
- Press and Hold Homelink Button: Press and hold the selected Homelink button.
- Press and Release Garage Door Opener Learn Button: At the same time, have your second person (or quickly move to do it yourself) press and immediately release the “Learn” button on your garage door opener motor unit.
- Observe Homelink Indicator Light: The Homelink indicator light will typically blink slowly, then turn solid or blink rapidly.
- Slow Blink: The system is receiving a signal.
- Solid Light or Rapid Blink: The system has learned the signal. This can take anywhere from a few seconds to a minute.
- Release Homelink Button: Once the Homelink indicator light changes, release the Homelink button you were holding.
- Test the Door: Press the Homelink button you just programmed. If it works, congratulations! Your Homelink garage door without remote is now set up.
Troubleshooting Phase 2:
- No Response: If the Homelink light doesn’t change or the door doesn’t operate, try the process again. Ensure you are pressing and releasing the Learn button correctly and holding the Homelink button until the indicator light changes.
- Repeated Presses Needed: Some older garage door openers or certain brands might require you to press and release the Homelink button after the indicator light changes, rather than just holding it.
- Range Issues: Try moving your vehicle closer to the motor unit.
Alternative Programming Methods (When Direct Sync Fails)
If the direct sync method doesn’t work, especially with newer garage door openers that use “rolling codes” for enhanced security, you’ll need to utilize your existing remote as an intermediary. However, since the goal is Homelink programming without remote, this usually applies when you have the remote but want to learn the process of syncing Homelink directly, or if you lost the specific remote that came with the opener and are trying to use a replacement.
If you have a universal remote or a replacement remote that isn’t the original:
Even if it’s not the original, you can often use a compatible remote. The process is similar to the direct method but uses the remote to signal the garage door opener.
- Locate and Access Your Garage Door Opener Remote: You need a functional remote that operates your garage door.
- Clear Homelink: Follow Phase 1 above to clear existing Homelink codes.
- Ignition ON: Turn your vehicle’s ignition to the ON/ACCESSORY position.
- Hold Remote Near Homelink: Take the functional remote and hold it about 1-3 inches away from the Homelink buttons on your vehicle.
- Press and Hold Homelink Button: Press and hold the Homelink button you wish to program.
- Press and Hold Remote Button: Simultaneously, press and hold the button on your remote that opens your garage door.
- Observe Homelink Indicator Light: Watch the Homelink indicator light. It will blink slowly, then turn solid or blink rapidly, indicating it has learned the signal from your remote. This can take up to 30 seconds.
- Release Both Buttons: Once the Homelink indicator light changes, release both the Homelink button and the remote button.
- Test: Press the programmed Homelink button to see if it operates the garage door.
If the above fails, you might need to “train” the opener using the remote:
This is more common for older, fixed-code openers.
- Clear Homelink: Follow Phase 1 above.
- Ignition ON: Turn your vehicle’s ignition to the ON/ACCESSORY position.
- Take Your Functional Remote: Go to your garage door opener motor unit.
- Press and Hold Remote Button: Press and hold the button on your remote that opens your garage door.
- Simultaneously Press and Hold Homelink Button: While holding the remote button, press and hold the Homelink button you want to program in your vehicle.
- Observe Indicator: You should see the Homelink indicator light start to blink slowly.
- Release Both Buttons: Once the Homelink light blinks rapidly or turns solid, release both buttons.
- Test: Press the Homelink button to operate the door.
Advanced Scenarios and Specific Opener Types
Some garage door opener systems, especially those with rolling codes, require a slightly different approach when programming Homelink without a remote. This often involves a “training” phase with the garage door opener motor unit itself.
Rolling Code Garage Door Openers
Rolling code technology adds an extra layer of security. Each time you use the remote, a new code is sent, and the opener knows to expect it. This is where directly programming without the remote can become more complex if the opener itself doesn’t easily facilitate direct learning.
If the direct sync (Phase 2) doesn’t work, it’s likely due to rolling codes. In these cases, you must have a working remote to initiate the programming. The process is as follows:
- Clear Homelink: As always, clear existing Homelink codes (Phase 1).
- Ignition ON: Turn your vehicle’s ignition to the ON/ACCESSORY position.
- Take Your Functional Remote: Go to your garage door opener motor unit.
- Press and Release the Learn Button: Press and immediately release the “Learn” button on the opener motor unit. A nearby LED light will illuminate or flash, indicating the opener is in “learn mode.” This mode typically lasts for about 30 seconds.
- Return to Your Vehicle: Quickly get back into your vehicle.
- Press and Hold the Homelink Button: Press and hold the Homelink button you want to program.
- Observe the Homelink Indicator Light: The Homelink indicator light will blink slowly, then turn solid or blink rapidly.
- Release the Homelink Button: Release the button once the indicator light confirms it has learned the code.
- Test: Press the Homelink button to operate your garage door.
This method effectively uses your remote to “activate” the opener’s learn mode, and then your Homelink system “listens” for and learns the signal from the opener. While it technically requires a working remote to initiate the learn mode on the opener, it achieves Homelink setup without opener in terms of needing to program through the opener’s remote’s signals directly.
Dual-Frequency and Multi-Frequency Openers
Some garage door openers use multiple frequencies (e.g., 310 MHz and 315 MHz) or have adjustable frequencies. Your vehicle’s Homelink system also operates on specific frequencies.
- Homelink Frequency Range: Most Homelink systems cover frequencies between 288 MHz and 400 MHz, and some newer systems cover up to 915 MHz.
- Checking Your Opener’s Frequency: This information is usually in your garage door opener’s manual or sometimes printed on the unit itself.
If your opener operates on a frequency not covered by your Homelink system, you may need a Homelink Compatibility Bridge. However, this is less common with modern systems.
What if You Still Can’t Program?
If you’ve followed these steps meticulously and still can’t get your Homelink door opener without remote to work, consider these points:
- Opener Age: Very old openers (pre-1995) might use different technologies that are not compatible with Homelink.
- System Compatibility: While rare, some specific garage door opener brands or models might have unique programming requirements. Check the Homelink website or your vehicle manufacturer’s website for compatibility lists or specific instructions for your opener model.
- Interference: Other radio devices in your home or neighborhood could potentially interfere.
- Faulty Homelink System: In very rare cases, the Homelink transmitter in your vehicle might be faulty.
- Faulty Opener: Your garage door opener motor unit itself could be malfunctioning.
Frequently Asked Questions (FAQ)
Q1: Can I program Homelink without ever having the original remote?
A: Yes, the direct syncing method described in Phase 2 of this guide allows you to program Homelink directly from the garage door opener motor unit without needing the original remote. This is the primary way to achieve Homelink programming without remote.
Q2: What if my garage door opener has a rolling code system? Do I still need the remote for Homelink?
A: For rolling code systems, you will typically need a working remote to initiate the learn mode on the garage door opener motor unit itself, even if you are programming Homelink. The process involves pressing the learn button on the opener, then quickly going to your car and pressing the Homelink button. The Homelink system learns the signal from the opener unit when it’s in its learn mode. So, while you don’t use the remote to transmit the code to Homelink directly, you use it to activate the opener’s readiness to receive a new code.
Q3: How do I reprogram Homelink without the original remote if I lost it?
A: If you’ve lost the original remote, you will need to use the learn button on your garage door opener motor unit directly. Follow the steps in Phase 2 of this guide. If your system is a rolling code system, you might need to get a replacement remote or a universal remote compatible with your opener to trigger the learning process on the opener unit. However, the ultimate goal is to have Homelink control the door without needing to hold any physical remote.
Q4: My Homelink indicator light is flashing rapidly. What does that mean?
A: A rapidly flashing or solid indicator light usually means that the Homelink system has successfully learned a code. If the garage door doesn’t operate, try pressing and releasing the Homelink button once more. If it still doesn’t work, you may need to repeat the entire programming process.
Q5: Is there a way to access my garage door without a remote or Homelink?
A: While this guide focuses on Homelink, other access methods for your garage door without a remote include:
* Keypad: Most modern garage door openers have an external keypad.
* Wall Control Panel: The wired button inside your garage.
* Smartphone Apps: If you have a smart garage door opener or a smart home hub.
* Manual Override: In emergencies, you can often disengage the opener and lift the door manually, but this requires you to be physically at the garage door.
Q6: What if my garage door opener remote isn’t a “rolling code” type?
A: If your garage door opener uses a fixed code (older systems), the programming process is usually simpler. You can typically press and hold the Homelink button, then press and hold the remote button until the Homelink indicator light changes. The direct sync method (Phase 2) also works reliably for fixed-code openers.
Conclusion
Programming your Homelink system without the original remote is achievable with the right knowledge and a methodical approach. By locating the “Learn” button on your garage door opener motor unit and following the correct sequence, you can gain seamless Homelink access without remote. Remember to consult your vehicle’s owner’s manual for specific instructions related to your car model. Whether you’re dealing with a lost remote or setting up a new system, this guide provides the steps for effective Homelink programming without remote, allowing you to enjoy the convenience of your integrated vehicle system.