
Image Source: www.adayinthekitchen.com
How To Make Deli Meat At Home: Easy Guide & Flavorful Recipes
Can you make deli meat at home? Yes, you absolutely can! Making your own deli meats allows you to control the ingredients, avoid preservatives, and create unique flavor profiles. It’s a rewarding process that results in delicious, high-quality meats for your sandwiches and charcuterie boards. This guide will walk you through the basics, from brining to cooking and slicing, along with some flavorful recipes to get you started.
Why Make Your Own Deli Meat?
Creating deli meat at home offers several compelling advantages:
- Ingredient Control: You know exactly what goes into your meat. No more mystery additives, nitrates (unless you choose to use them for curing), or excessive sodium.
- Cost Savings: While the initial investment in good quality meat might seem higher, the per-pound cost often works out to be less than store-bought, especially for premium deli selections.
- Flavor Customization: You can experiment with different herbs, spices, brines, and smoking techniques to create flavors that perfectly suit your taste.
- Freshness and Quality: Homemade deli meat is incredibly fresh, offering a superior taste and texture compared to many pre-packaged options.
- Healthier Options: By reducing sodium and eliminating artificial ingredients, you can create a healthier alternative for your family.
- Satisfying Hobby: The process of cured meats recipe development and execution can be a fun and engaging culinary pursuit.
The Fundamentals: Brining and Curing
The foundation of most deli meats lies in brining meat for slicing. Brining is a process of soaking meat in a saltwater solution, often with added flavorings. This not only seasons the meat but also helps to tenderize it and retain moisture during cooking.
For some meats, like bacon and corned beef, a dry cure or a combination of dry and wet curing (often referred to as meat preservation techniques) is used. Curing involves salt, and often other curing agents like Prague powder (a mix of salt and sodium nitrite), which helps to preserve the meat, give it a characteristic pink color, and prevent the growth of harmful bacteria.
Understanding Brine Solutions
A basic brine consists of water and salt. However, you can enhance it with:
- Sugar: Balances the saltiness and aids in browning. Brown sugar, maple syrup, or honey are great options.
- Aromatics: Garlic, bay leaves, peppercorns, and juniper berries add depth of flavor.
- Herbs: Rosemary, thyme, sage, and dill are popular choices.
- Spices: Mustard seeds, coriander, and chili flakes can add a kick.
- Curing Salts (Optional but Recommended for Safety): Prague Powder #1 is used for fresh sausage and quick cures, while Prague Powder #2 is used for dry-cured products that will be aged. These are essential for preventing botulism in longer curing processes. Always follow recommended usage rates for curing salts, as too much can be harmful.
Basic Brine Ratio (for every 1 cup of water):
- 1-2 tablespoons of kosher salt (or half the amount of fine sea salt)
- 1 tablespoon of sugar (optional)
Example Brine for Chicken or Turkey Breast:
- 4 cups water
- 1/4 cup kosher salt
- 2 tablespoons brown sugar
- 2 cloves garlic, smashed
- 1 teaspoon black peppercorns
- 1 bay leaf
The Curing Process: Dry Cure vs. Wet Cure
-
Wet Curing (Brining): Meat is submerged in a saltwater solution (brine). This is generally faster and more straightforward for beginners. It’s ideal for cooking deli ham and chicken or turkey breast.
-
Dry Curing: Meat is coated with a mixture of salt, sugar, and spices. This draws moisture out of the meat through osmosis. This method is used for products like smoking bacon at home and creating authentic homemade charcuterie. It requires more patience and careful temperature/humidity control.
Preparing Your Meat for Slicing
Regardless of the method, the goal is to cook the meat evenly and safely, resulting in a firm texture that holds up well to slicing.
Key Steps for Success:
- Choose Quality Meat: Start with fresh, high-quality cuts of meat. For roast beef, choose a lean, tender cut like sirloin or eye of round. For turkey or chicken breast, a whole boneless, skinless breast is ideal.
- Trim Excess Fat: While some fat is good for flavor, too much can make slicing difficult. Trim as needed.
- Brine or Cure: Follow your chosen recipe carefully. Ensure the meat is fully submerged in the brine or completely coated in the dry cure.
- Rinse and Pat Dry: After brining or curing, rinse the meat thoroughly under cold water to remove excess salt. Pat it completely dry with paper towels. This is crucial for achieving a good sear or developing a nice crust.
- Cook: The cooking method will vary depending on the type of deli meat. Common methods include roasting, poaching, or slow cooking.
- Cool and Chill: Allow the meat to cool slightly, then wrap it tightly and refrigerate for at least several hours, or preferably overnight. Chilling firms the meat, making it much easier to slice thinly.
- Slice Thinly: Use a sharp knife or a deli slicer for the best results.
Delicious Deli Meat Recipes
Let’s dive into some specific recipes to get you started on your homemade charcuterie journey.
1. Simple Roast Beef Slices
Making roast beef slices at home is surprisingly easy and yields fantastic results for sandwiches.
Ingredients:
- 2-3 lb beef sirloin tip roast or eye of round
- 2 tablespoons olive oil
- 1 teaspoon salt
- 1/2 teaspoon black pepper
- 1 teaspoon garlic powder
- 1 teaspoon onion powder
- 1 teaspoon dried rosemary
- 1 teaspoon dried thyme
Instructions:
- Preheat Oven: Preheat your oven to 450°F (230°C).
- Prepare the Roast: Pat the beef roast dry with paper towels.
- Season: In a small bowl, mix together olive oil, salt, pepper, garlic powder, onion powder, rosemary, and thyme. Rub this mixture all over the beef roast.
- Sear: Place the seasoned roast in a roasting pan. Sear in the preheated oven for 15 minutes.
- Reduce Heat: Reduce the oven temperature to 325°F (160°C).
- Roast: Continue roasting until a meat thermometer inserted into the thickest part registers 130-135°F (54-57°C) for medium-rare (about 15-20 minutes per pound). For medium, aim for 140-145°F (60-63°C).
- Rest: Remove the roast from the oven and let it rest on a cutting board, loosely tented with foil, for at least 15-20 minutes. This is crucial for juicy meat.
- Chill: Once slightly cooled, wrap the roast tightly in plastic wrap and then in foil. Refrigerate for at least 4-6 hours, or preferably overnight. This chilling step is essential for achieving thin, clean slices.
- Slice: Using a sharp knife or a deli slicer, slice the roast beef as thinly as possible against the grain.
2. Juicy Deli Ham
Cooking deli ham at home is a rewarding way to enjoy a classic deli staple.
Ingredients:
- 3-4 lb boneless pork loin roast or ham roast
- Brine Ingredients:
- 8 cups water
- 1/2 cup kosher salt
- 1/4 cup brown sugar
- 2 tablespoons maple syrup
- 4 cloves garlic, smashed
- 1 teaspoon black peppercorns
- 2 bay leaves
- Glaze (Optional):
- 1/4 cup honey or brown sugar
- 1 tablespoon Dijon mustard
Instructions:
- Prepare the Brine: In a large pot, combine water, kosher salt, brown sugar, maple syrup, garlic, peppercorns, and bay leaves. Heat gently, stirring until the salt and sugar are dissolved. Let the brine cool completely, then chill it in the refrigerator.
- Brine the Pork: Place the pork loin roast in a large non-reactive container or a heavy-duty zip-top bag. Pour the chilled brine over the pork, ensuring it’s fully submerged. If it’s not fully covered, you may need to make more brine or use a smaller container.
- Refrigerate: Cover the container (or seal the bag) and refrigerate for 12-24 hours. For a 3-4 lb roast, 18-24 hours is recommended.
- Rinse and Dry: Remove the pork from the brine and rinse it thoroughly under cold water. Pat it completely dry with paper towels.
- Preheat Oven: Preheat your oven to 325°F (160°C).
- Roast: Place the pork roast in a roasting pan. Roast for approximately 20-25 minutes per pound, or until the internal temperature reaches 150°F (65°C).
- Glaze (Optional): In the last 30 minutes of cooking, brush the roast with the optional glaze mixture.
- Rest: Remove the ham from the oven and let it rest for 15-20 minutes before slicing.
- Chill: Wrap the ham tightly and refrigerate for at least 4 hours, or preferably overnight, for easier slicing.
- Slice: Slice the ham thinly against the grain.
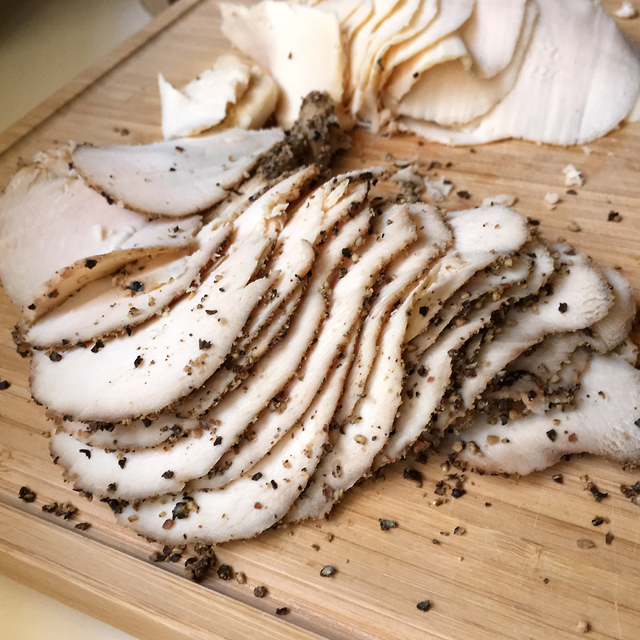
3. Seasoning Deli Turkey
Seasoning deli turkey at home can transform plain turkey breast into a flavorful deli favorite.
Ingredients:
- 1 whole boneless, skinless turkey breast (about 3-4 lbs)
- Dry Rub Ingredients:
- 2 tablespoons paprika
- 1 tablespoon garlic powder
- 1 tablespoon onion powder
- 1 teaspoon dried sage
- 1 teaspoon dried thyme
- 1 teaspoon black pepper
- 1/2 teaspoon salt (adjust based on preference)
- Optional Brine: Use the basic brine recipe or the turkey brine from the ham recipe for extra moisture.
Instructions:
- Brine (Optional): If brining, follow the steps for the deli ham, using the turkey breast. Brining is highly recommended for turkey to prevent it from drying out.
- Prepare Turkey: If not brined, rinse the turkey breast and pat it completely dry with paper towels.
- Make Dry Rub: In a small bowl, combine paprika, garlic powder, onion powder, sage, thyme, black pepper, and salt.
- Apply Rub: Generously rub the spice mixture all over the turkey breast, ensuring it’s evenly coated.
- Preheat Oven: Preheat your oven to 350°F (175°C).
- Roast: Place the seasoned turkey breast in a roasting pan. Roast for about 15-20 minutes per pound, or until the internal temperature reaches 165°F (74°C) in the thickest part.
- Rest: Let the turkey breast rest for 10-15 minutes before slicing.
- Chill: Wrap the turkey breast tightly and refrigerate for at least 4 hours, or overnight, for best slicing results.
- Slice: Slice the turkey breast as thinly as possible.
4. Creating Corned Beef
Creating corned beef is a classic curing process that requires patience but yields a deeply flavorful result. This recipe uses Prague Powder #1 for curing.
Ingredients:
- 3-4 lb beef brisket flat cut
- Curing Brine Ingredients:
- 1 gallon (16 cups) cold water
- 1 cup kosher salt
- 1/2 cup brown sugar
- 2 tablespoons Prague Powder #1 (ensure you use the correct percentage for the weight of the meat – typically 1 oz per 5 lbs of meat for #1)
- 1 tablespoon pickling spice (or a mix of mustard seeds, coriander seeds, dill seeds, peppercorns, bay leaves)
- 4-5 cloves garlic, smashed
Instructions:
- Prepare Curing Brine: In a large non-reactive container, combine cold water, kosher salt, brown sugar, Prague Powder #1, pickling spice, and garlic. Stir until salt and sugar are dissolved.
- Cure the Brisket: Place the brisket in the curing brine, ensuring it is fully submerged. You may need to use a plate or weight to keep it down.
- Refrigerate: Cover the container and refrigerate for 5-7 days. Flip the brisket daily to ensure even curing.
- Rinse and Soak: After curing, remove the brisket from the brine. Rinse it thoroughly under cold water to remove excess salt. Then, soak the brisket in fresh cold water for 1-2 hours, changing the water every 30 minutes. This helps to remove some of the saltiness.
- Cook: Place the rinsed and soaked brisket in a large pot. Cover with fresh cold water. Add some of the pickling spices if desired. Bring to a simmer, then reduce heat to low, cover, and cook for 2.5-3.5 hours, or until tender.
- Cool: Let the brisket cool in the cooking liquid. Once cool enough to handle, remove it from the liquid.
- Chill: Wrap the brisket tightly and refrigerate for at least 4 hours, or preferably overnight. This is crucial for slicing.
- Slice: Slice the corned beef thinly against the grain.
5. Preparing Pastrami
Pastrami is typically made from brisket, cured, and then coated in a flavorful spice rub before being smoked or steamed.
Ingredients:
- 3-4 lb beef brisket flat cut
- Curing Brine Ingredients: Use the same brine as the Corned Beef recipe (5-7 days curing).
- Pastrami Rub Ingredients:
- 1/4 cup coarse black peppercorns, coarsely crushed
- 2 tablespoons coriander seeds, coarsely crushed
- 1 tablespoon smoked paprika
- 1 tablespoon garlic powder
- 1 teaspoon mustard powder
- 1 teaspoon smoked paprika
- 1/2 teaspoon cayenne pepper (optional)
Instructions:
- Cure the Brisket: Follow steps 1-3 from the Corned Beef recipe (cure for 5-7 days).
- Rinse and Soak: Rinse the brisket thoroughly and soak it in fresh cold water for 1-2 hours, changing the water periodically.
- Dry Rub: Mix all the Pastrami Rub ingredients in a bowl. Pat the brisket completely dry with paper towels. Generously coat the entire surface of the brisket with the spice rub, pressing it in firmly.
- Smoke or Steam:
- Smoking: If you have a smoker, smoke the brisket at a low temperature (around 225-250°F / 107-121°C) for 4-6 hours, or until the internal temperature reaches 165-170°F (74-77°C). You can wrap it in butcher paper during the last couple of hours if desired.
- Steaming: If you don’t have a smoker, you can steam the pastrami. Place the rubbed brisket in a steamer basket over simmering water, cover tightly, and steam for 3-4 hours, or until tender.
- Cool and Chill: Allow the pastrami to cool slightly. Wrap it tightly in plastic wrap and then foil. Refrigerate for at least 4 hours, or preferably overnight.
- Slice: Slice the pastrami thinly against the grain.
Smoking Bacon at Home
Smoking bacon at home is a two-part process: curing and smoking. This requires more time and attention but is incredibly rewarding.
Ingredients:
- 5 lb pork belly, skin removed
- Dry Cure Ingredients:
- 1/2 cup kosher salt
- 1/4 cup brown sugar
- 1 tablespoon Prague Powder #2 (for dry-cured products)
- 1 teaspoon black pepper
- 1 teaspoon garlic powder
- 1 teaspoon smoked paprika
Instructions:
- Prepare Pork Belly: Rinse the pork belly and pat it completely dry.
- Make Dry Cure: In a bowl, mix together kosher salt, brown sugar, Prague Powder #2, black pepper, garlic powder, and smoked paprika.
- Apply Cure: Generously coat the pork belly on all sides with the dry cure mixture.
- Package: Place the cured pork belly in a large zip-top bag or a non-reactive container. Ensure it’s well-sealed.
- Refrigerate: Cure in the refrigerator for 7-10 days, flipping the pork belly daily to ensure even curing. You’ll notice moisture being drawn out.
- Rinse and Dry: After curing, rinse the pork belly thoroughly under cold water. Pat it completely dry with paper towels.
- Chill/Dry: For a crispier finish, you can air-dry the pork belly in the refrigerator, uncovered, for another 12-24 hours. This helps form a pellicle, which aids in smoke adhesion.
- Smoke: Preheat your smoker to 200-225°F (95-107°C). Smoke the pork belly until the internal temperature reaches 150°F (65°C). This can take 3-5 hours, depending on the thickness.
- Cool: Remove from the smoker and let it cool slightly.
- Chill: Wrap the bacon tightly and refrigerate for at least a few hours, or overnight, before slicing.
- Slice: Slice the bacon to your desired thickness.
Equipment You’ll Need
- Sharp Knives: A good chef’s knife and a serrated knife are essential.
- Cutting Board: A sturdy cutting board is a must.
- Meat Slicer (Optional but Highly Recommended): For truly deli-thin slices, a home deli slicer makes a world of difference.
- Roasting Pan: For cooking larger roasts.
- Non-Reactive Containers: For brining and curing (glass, ceramic, or food-grade plastic).
- Heavy-Duty Zip-Top Bags: An alternative for brining and curing.
- Meat Thermometer: Crucial for ensuring safe cooking temperatures.
- Smoker (for bacon): If you plan on smoking meats.
Tips for Slicing
- Chill Thoroughly: This is the most important tip. Cold meat slices much cleaner and thinner than warm or room-temperature meat.
- Use a Sharp Blade: A dull knife will tear the meat, resulting in ragged slices.
- Slice Against the Grain: For cuts like brisket or roast beef, identify the direction of the muscle fibers and slice perpendicular to them. This results in more tender slices.
- Use a Deli Slicer: If you have one, invest time in learning how to use it properly. It will give you incredibly uniform and thin slices.
Frequently Asked Questions (FAQ)
Q1: How long can homemade deli meat be stored?
A1: Properly stored homemade deli meat typically lasts 3-5 days in the refrigerator. For longer storage, it can be frozen, though the texture may change slightly upon thawing. Ensure it’s wrapped tightly to prevent freezer burn.
Q2: What is Prague Powder and why is it used?
A2: Prague Powder (also known as curing salt or pink salt) is a mixture of salt and sodium nitrite or nitrate. It’s used in curing meats to prevent the growth of harmful bacteria like Clostridium botulinum, which causes botulism. It also imparts a characteristic pink color and a distinct cured flavor. Always follow recommended ratios precisely when using curing salts.
Q3: Can I make deli meat without curing salts?
A3: You can make some deli-style meats without curing salts, like the simple roast beef or seasoned turkey breast, by relying on cooking and chilling. However, for meats that involve longer preservation or a traditional cured flavor (like corned beef, pastrami, or bacon), curing salts are essential for safety and proper flavor development.
Q4: My homemade deli meat is too salty. What went wrong?
A4: This could be due to several reasons:
* Brine Concentration: You might have used too much salt in your brine. Double-check your measurements.
* Insufficient Rinsing: Not rinsing the meat thoroughly after brining can leave excess salt on the surface.
* Soaking Time: For cured meats like corned beef, insufficient soaking after curing can leave it too salty.
Q5: How do I get my deli meat slices really thin?
A5: The key is chilling the meat thoroughly until it’s very firm. Using a sharp knife or, ideally, a dedicated deli slicer will also help you achieve those paper-thin slices.
Making your own deli meat is a journey into the world of meat preservation techniques and flavor creation. With a little practice, you can enjoy delicious, high-quality deli meats right from your own kitchen. Enjoy experimenting with these recipes and creating your own signature flavors!