
Do you want to know how to make a garden bench? Yes, you can easily build your own garden bench with these straightforward plans. This guide will walk you through the steps to create a beautiful and sturdy addition to your garden.
Creating your own garden bench is a rewarding DIY project that adds charm and functionality to your outdoor space. Whether you’re looking for a simple place to sit and enjoy nature or a more elaborate piece for entertaining, these easy garden bench plans are designed for beginners and experienced woodworkers alike. We’ll cover everything from selecting materials to the final finishing touches, ensuring your backyard bench project is a success. You’ll learn how to build outdoor bench structures that are both practical and aesthetically pleasing.
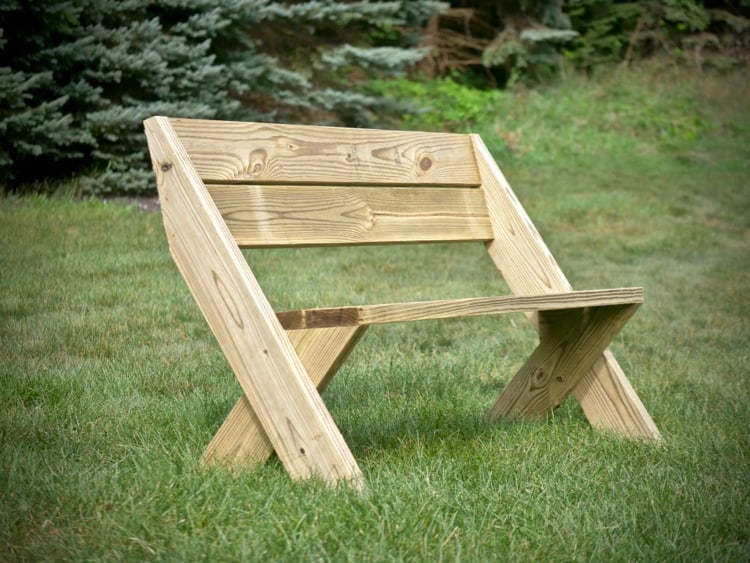
Image Source: rogueengineer.com
Designing Your Dream Garden Bench
The first step in any successful DIY project is good planning. Your garden bench design should consider the space it will occupy, its intended use, and your personal style. Think about the size – do you need a small, intimate bench for a quiet corner, or a larger one to accommodate several people? What about the height and depth of the seat? These details are crucial for comfort.
Style Considerations
Your garden bench can be a simple, rustic piece or a more modern statement.
- Rustic Charm: This often involves using natural, weathered wood, perhaps even reclaimed materials. A recycled wood bench can have a unique character and an eco-friendly appeal.
- Classic Elegance: Think clean lines, smooth finishes, and perhaps some decorative elements like curved legs or a slatted seat.
- Modern Simplicity: Minimalist designs with straight lines and functional aesthetics work well in contemporary gardens.
Material Choices
The material you choose will impact the look, durability, and maintenance of your bench.
- Wood: This is the most common material for garden benches.
- Cedar: Naturally resistant to rot and insects, cedar is an excellent choice for outdoor furniture. It has a beautiful natural color.
- Redwood: Similar to cedar, redwood is also durable and resistant to decay.
- Pressure-Treated Pine: This is a more budget-friendly option. It’s treated to resist rot and insects, but it can sometimes warp or split if not sealed properly.
- Hardwoods (like Oak or Teak): These are very durable and beautiful but can be more expensive and heavier to work with.
- Metal: While less common for DIY benches, metal can be used for frames or as the primary material for a more industrial look.
- Recycled Materials: As mentioned, a recycled wood bench can be a fantastic project. Old fence posts, pallets, or salvaged lumber can be repurposed.
Essential Tools and Supplies
Before you start cutting, gather all your tools and supplies. This list covers the basics for most woodworking bench plans.
Tools:
- Measuring tape
- Pencil
- Saw (hand saw, circular saw, or miter saw)
- Drill with drill bits
- Screwdriver bits
- Sander (orbital sander or sandpaper)
- Clamps
- Safety glasses
- Work gloves
Supplies:
- Lumber (as per your chosen plans)
- Wood screws (exterior grade)
- Wood glue (exterior grade)
- Sandpaper (various grits)
- Wood sealant or exterior paint/stain
- Brushes or rags for finishing
Simple Garden Bench Plans: A Step-by-Step Guide
These DIY bench plans are designed for a basic, sturdy garden bench, perfect for a beginner. This bench construction guide focuses on simplicity and functionality.
Bench Dimensions (Example):
- Length: 4 feet (approx. 122 cm)
- Width: 18 inches (approx. 46 cm)
- Height: 18 inches (approx. 46 cm)
Materials Needed (Example for a basic pine bench):
| Item | Description | Quantity |
|---|---|---|
| 2×4 Lumber | For legs and support structure | 4 x 8-foot boards |
| 1×6 Lumber | For seat slats | 3 x 8-foot boards |
| 2×6 Lumber | For armrests (optional, can use 1×6 or 2×4) | 2 x 6-foot boards |
| Wood Screws | 2.5-inch exterior grade | Approx. 50 |
| Wood Glue | Exterior grade | 1 bottle |
| Sandpaper | 80, 120, 220 grit | As needed |
| Wood Sealant | Exterior grade | 1 quart |
Step 1: Cutting Your Lumber
Accurate cuts are key to a well-built bench. Measure twice, cut once!
- Legs: Cut four pieces of 2×4 lumber to 17 inches (approx. 43 cm) each. These will be your bench legs.
- Aprons (Front/Back): Cut two pieces of 2×4 lumber to 42 inches (approx. 107 cm) each. These will connect the legs at the front and back of the bench.
- Aprons (Sides): Cut two pieces of 2×4 lumber to 15 inches (approx. 38 cm) each. These will connect the legs on the sides.
- Seat Slats: Cut three pieces of 1×6 lumber to 48 inches (approx. 122 cm) each. These form the seat.
- Armrests (Optional): If adding armrests, cut two pieces of 2×6 lumber to 20 inches (approx. 51 cm) each.
Step 2: Assembling the Leg Frames
You’ll create two simple H-shaped frames for the ends of your bench.
- Take two leg pieces (17-inch 2x4s) and one side apron piece (15-inch 2×4).
- Position the side apron piece between the two legs, flush with the top ends. The legs will be on the outside of the apron.
- Apply wood glue to the ends of the apron where it meets the legs.
- Pre-drill pilot holes through the legs into the apron to prevent splitting.
- Secure the apron to the legs using two 2.5-inch wood screws on each side.
- Repeat this process to create the second leg frame.
Step 3: Connecting the Leg Frames
Now, you’ll connect the two leg frames using the front and back aprons.
- Stand your two leg frames upright.
- Position the front apron piece (42-inch 2×4) between the front legs of the two frames, flush with the top.
- Apply wood glue to the ends of the apron.
- Pre-drill pilot holes through the legs into the apron.
- Secure the front apron with two 2.5-inch wood screws on each end.
- Repeat this process for the back apron piece. You should now have a sturdy rectangular base.
Step 4: Attaching the Seat Slats
This is where your bench starts to take shape.
- Lay your three 1×6 seat slats across the top of the assembled base, ensuring they are evenly spaced. You want a small gap between them for water drainage.
- Position the slats so they overhang the front and back aprons slightly for a finished look.
- Apply a bead of wood glue along the top edge of the front and back aprons where the slats will rest.
- Pre-drill pilot holes through the slats into the aprons.
- Secure each slat to the front and back aprons with two 2.5-inch wood screws on each end.
Step 5: Adding Armrests (Optional)
If you want armrests, this is the step to add them.
- Position one 20-inch 2×6 armrest piece on top of one of the side aprons. You can have it flush with the end of the bench, or have it overhang slightly.
- Apply wood glue to the top edge of the side apron.
- Pre-drill pilot holes down through the armrest into the side apron.
- Secure the armrest with three 2.5-inch wood screws.
- Repeat for the other side.
Step 6: Sanding and Finishing
This step is crucial for both the look and longevity of your bench.
- Sanding: Start with a coarser grit sandpaper (80 or 120) to smooth out any rough edges or imperfections. Then, move to a finer grit (220) for a smooth finish. Pay attention to all surfaces, especially the seat and armrests.
- Cleaning: Wipe down the entire bench with a damp cloth to remove all sawdust. Let it dry completely.
- Sealing/Staining: Apply an exterior-grade wood sealant, stain, or paint. Follow the manufacturer’s instructions. Typically, you’ll need at least two coats. This will protect the wood from weather and UV rays.
Congratulations! You’ve successfully completed your easy garden bench and have a fantastic backyard bench project to show for it.
Advanced Garden Bench Plans: Adding Detail and Comfort
For those who want to try something a bit more involved, here are some ideas to elevate your garden bench design. These might involve slightly more complex cuts or assembly.
Bench Seating Plans with a Backrest
Adding a backrest significantly increases comfort and transforms your simple seat into a classic garden bench.
Additional Materials:
- 2×4 lumber for backrest supports and slats.
- Screws suitable for attaching to the seat frame.
Steps for Adding a Backrest:
- Cut Backrest Supports: Cut two pieces of 2×4 lumber to your desired backrest height (e.g., 18-24 inches or 46-61 cm).
- Attach Supports: Attach these supports to the rear edge of the seat. You can do this by screwing them into the back apron and the underside of the seat slats. Angle them slightly backward for comfort.
- Add Backrest Slats: Cut 1×6 or 1×4 boards for the backrest. Space them evenly and screw them into the backrest supports. You can stagger them for a decorative effect.
Bench with Curved Elements
Incorporating gentle curves can add a sophisticated touch to your garden bench design.
- Curved Legs: Instead of straight 2x4s, you can use thicker lumber (like a 2×6 or 2×8) and draw a curved line using a flexible ruler or string. Cut carefully with a jigsaw.
- Curved Armrests: Similar to legs, armrests can be shaped with curves for a more ergonomic feel.
Using a Recycled Wood Bench Approach
When working with reclaimed materials like pallet wood, remember:
- Deconstruction: Carefully take apart pallets, removing all nails.
- Cleaning and Preparation: Sand the wood thoroughly to remove any splinters or rough patches. You might need a wire brush to clean off dirt.
- Design Flexibility: Pallet wood often comes in varying widths and thicknesses. Adapt your DIY bench plans to accommodate these variations. You might end up with a more eclectic, unique recycled wood bench.
- Treatment: Ensure reclaimed wood is treated or sealed properly, as its original condition might be unknown.
Building an Outdoor Bench: Maintenance and Care
Proper maintenance will ensure your garden bench lasts for years.
Regular Cleaning
- Wipe down your bench regularly with a damp cloth to remove dust, pollen, and debris.
- For stubborn dirt or mildew, use a mild soap and water solution. Avoid harsh chemicals that can damage the finish.
Reapplying Sealant/Stain
- Inspect your bench annually. If the finish looks dull or weathered, it’s time for a reapplication.
- Clean the bench thoroughly and allow it to dry completely before applying a fresh coat of sealant or stain.
Protecting in Winter
- In regions with harsh winters, consider covering your bench with a waterproof tarp or bringing it indoors if possible. This will protect it from snow, ice, and extreme temperature fluctuations.
Frequently Asked Questions (FAQ)
Q1: What is the best type of wood for an outdoor garden bench?
A1: Cedar and redwood are excellent choices due to their natural resistance to rot, decay, and insects. Pressure-treated pine is a more budget-friendly option, but it’s essential to seal it well.
Q2: How do I prevent my wooden bench from rotting?
A2: Use naturally rot-resistant woods like cedar or redwood. If using other woods, ensure they are pressure-treated or apply multiple coats of a high-quality exterior wood sealant. Keeping the bench off the ground can also help with air circulation and prevent moisture buildup.
Q3: Can I build a garden bench with just a few tools?
A3: Yes, for simpler designs, you can get by with a hand saw, drill, screwdriver, sandpaper, and a measuring tape. More complex designs or faster cuts may benefit from power tools like a circular saw or miter saw.
Q4: How far apart should the seat slats be on a garden bench?
A4: A gap of about 1/4 inch to 1/2 inch (0.6 cm to 1.3 cm) between seat slats is generally recommended. This allows for water drainage and prevents moisture from pooling, which can lead to rot.
Q5: How do I ensure my bench is sturdy?
A5: Use strong, exterior-grade screws and wood glue for all joints. Pre-drilling pilot holes before screwing helps prevent wood splitting and ensures a tight fit. Make sure all your connections are secure and the bench sits level on the ground.
Q6: What kind of finish is best for a garden bench?
A6: An exterior-grade sealant, stain, or paint will protect the wood from the elements. For a natural look, a clear sealant is ideal. Stains can add color, and paints offer the most protection but may require more upkeep if they chip or fade.
Q7: How long will a DIY garden bench last?
A7: With proper construction using suitable materials and regular maintenance, a well-built wooden garden bench can last anywhere from 5 to 15 years, or even longer, depending on the wood type and environmental conditions.
Q8: Can I make a bench from pallet wood?
A8: Absolutely! A recycled wood bench made from pallets can be a fantastic and eco-friendly project. Just be sure to select heat-treated (HT) pallets and prepare the wood thoroughly by cleaning and sanding it.
Q9: What are some good woodworking bench plans for beginners?
A9: Look for plans that feature simple joinery, straight cuts, and minimal complex angles. The basic bench described in this article is an excellent starting point for beginners. Many websites offer free DIY bench plans with detailed instructions and diagrams.
Q10: How can I adapt these bench seating plans for different sizes?
A10: You can easily adjust the length of the seat slats and the aprons to make your bench longer or shorter. Ensure the leg structure is proportionally scaled and reinforced if you’re making a significantly larger bench.
This patio bench tutorial aims to empower you to create a beautiful, functional, and lasting piece of outdoor furniture. Happy building!