
Can you clean a night guard at home? Yes, you absolutely can and should clean your night guard at home to keep it hygienic and functioning properly. The best way to clean night guard is through a combination of daily rinsing, gentle brushing, and periodic soaking with appropriate solutions. This comprehensive guide will walk you through the most effective and safe methods to ensure your night guard remains sparkling clean and odor-free.
A clean night guard is crucial for your oral health. When you wear a night guard, it collects saliva, bacteria, and even small food particles. Without proper cleaning, these can build up, leading to unpleasant odors, potential infections, and even damage to the guard itself. Fortunately, maintaining your night guard doesn’t require expensive professional treatments. With a few simple steps and common household items, you can effectively clean and disinfect your night guard right in your own bathroom.
This article will cover everything from what you’ll need for cleaning to specific techniques for different types of cleaning, ensuring your night guard lasts longer and serves its purpose without compromising your health.
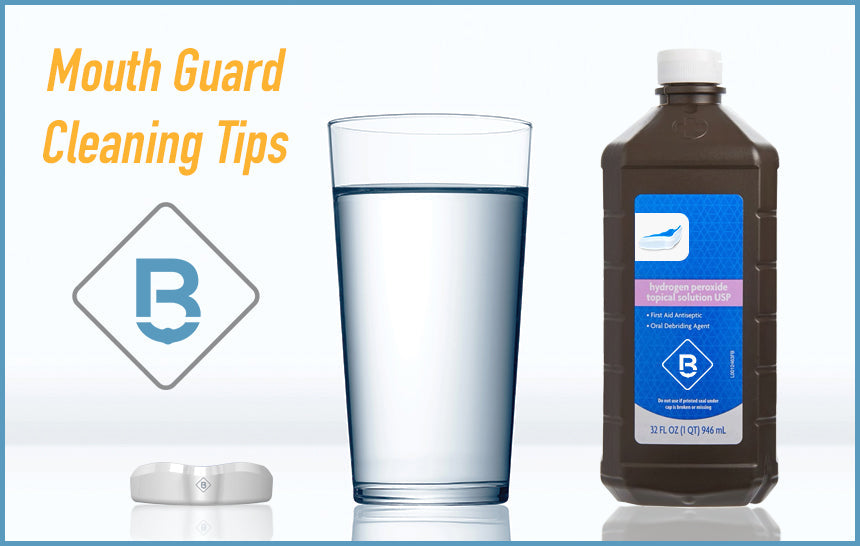
Image Source: www.bruxnightguard.com
Why Regular Night Guard Cleaning is Essential
Your night guard acts as a barrier against teeth grinding (bruxism) and clenching, protecting your teeth from wear and tear. However, this protective device can become a breeding ground for bacteria if not cleaned regularly. Here’s why consistent cleaning is non-negotiable:
- Preventing Odor: Saliva and bacteria naturally accumulate on the night guard, leading to a distinct, often unpleasant smell. Regular cleaning eliminates these odor-causing agents.
- Eliminating Bacteria: The warm, moist environment inside your mouth is ideal for bacterial growth. Your night guard traps this bacteria, and without cleaning, it can re-enter your mouth.
- Preventing Stains: Coffee, tea, wine, and even natural pigments from food can stain your night guard over time, making it look unsightly.
- Maintaining Material Integrity: Certain cleaning methods or lack of cleaning can degrade the material of your night guard, reducing its effectiveness and lifespan.
- Promoting Oral Health: A dirty night guard can harbor germs that might lead to oral health issues like bad breath or even gum irritation.
What You’ll Need for Night Guard Cleaning
Gathering the right supplies makes the cleaning process efficient and effective. You don’t need anything complicated; most items are readily available at home or a local drugstore.
Essential Supplies:
- Lukewarm Water: Never use hot water, as it can warp or damage the night guard material.
- Soft-Bristled Toothbrush: An old, but clean, toothbrush is perfect. Avoid stiff bristles that can scratch.
- Mild Dish Soap or Non-Abrasive Denture Cleaner: Gentle cleaning agents are key.
- Specialized Night Guard Cleaning Solution: These are formulated specifically for night guards.
- White Vinegar or Baking Soda: For occasional deep cleaning and odor removal.
- Hydrogen Peroxide (3% solution): For disinfection and whitening.
- Clean Towel: For drying.
- Clean Storage Case: To keep your night guard hygienic when not in use.
Daily Night Guard Cleaning: The Foundation of Hygiene
Establishing a solid daily night guard cleaning routine is the most important step in maintaining its cleanliness and longevity. This simple process takes just a couple of minutes each day but makes a world of difference.
Step-by-Step Daily Cleaning:
- Rinse Thoroughly: As soon as you remove your night guard in the morning, rinse it under lukewarm running water. This removes loose saliva and debris.
- Gentle Brushing:
- Apply a small amount of mild dish soap or a dab of non-abrasive toothpaste (ensure it’s not a whitening toothpaste with harsh abrasives) onto your soft-bristled toothbrush.
- Gently brush all surfaces of the night guard, paying attention to crevices where bacteria can hide. Remember, the goal is to clean, not to scrub aggressively.
- Rinse the night guard again under lukewarm water to remove all soap residue.
- Air Dry: Allow your night guard to air dry completely before placing it back in its case. You can pat it gently with a clean towel, but air drying is best to prevent introducing new bacteria.
- Clean the Case: Don’t forget to clean the storage case itself. Rinse it with water and let it air dry daily.
Following this routine will keep your night guard fresh and prevent significant buildup.
Deep Cleaning Your Night Guard: Tackling Buildup
While daily cleaning is essential, occasional deep cleaning can help remove stubborn plaque, stains, and odors. This can be done weekly or bi-weekly, depending on your needs.
Option 1: Baking Soda Night Guard Cleaning
Baking soda is a fantastic natural cleaner and deodorizer. It’s mildly abrasive, so it can help scrub away residue without being too harsh.
How to Use Baking Soda for Cleaning:
- Create a Paste: Mix a small amount of baking soda with enough water to form a paste.
- Apply and Scrub: Use your soft-bristled toothbrush to gently apply the paste to your night guard. Brush all surfaces of the night guard, focusing on any discolored areas or rough spots.
- Soak Briefly (Optional): For a deeper clean and deodorizing effect, you can soak night guard in a solution of baking soda and water. Mix one tablespoon of baking soda into a glass of lukewarm water and let the night guard soak for about 30 minutes.
- Rinse Thoroughly: After brushing or soaking, rinse the night guard very well under lukewarm running water to ensure all baking soda residue is removed. Any remaining baking soda can create a gritty feeling.
Important Note: While baking soda night guard cleaning is effective, avoid leaving it to soak for extended periods (hours), as it can potentially alter the material’s texture over time.
Option 2: White Vinegar Soak
White vinegar is a natural disinfectant and can help break down mineral deposits and neutralize odors.
How to Use White Vinegar for Cleaning:
- Prepare the Solution: Mix equal parts white vinegar and lukewarm water in a small bowl. For example, half a cup of vinegar and half a cup of water.
- Soak the Night Guard: Submerge your night guard in the vinegar-water solution.
- Soaking Time: Let it soak night guard for about 15-30 minutes. Avoid soaking for longer, as the acidity of vinegar could potentially affect some materials.
- Brush and Rinse: After soaking, gently brush the night guard with your soft-bristled toothbrush to remove any loosened debris. Rinse it thoroughly under lukewarm running water.
- Vinegar Smell: If a faint vinegar smell persists, you can rinse it again with water or soak it briefly in plain water.
Option 3: Denture Cleaner for Night Guard
Many people find that denture cleaner for night guard works very well. These cleaners are specifically formulated to break down proteins, remove stains, and kill bacteria on dental appliances.
How to Use Denture Cleaner:
- Follow Product Instructions: Always read and follow the specific instructions on the denture cleaner packaging.
- Dissolve Tablet/Powder: Typically, you’ll dissolve a cleaning tablet or powder in a container of lukewarm water.
- Soak the Night Guard: Place your night guard into the cleaning solution. Ensure it is fully submerged.
- Soaking Duration: Soak for the recommended time, usually 15-20 minutes. Some products may suggest overnight soaking, but check if it’s suitable for your specific night guard material.
- Rinse Thoroughly: After soaking, remove the night guard and rinse it exceptionally well under lukewarm running water. It’s crucial to remove all traces of the denture cleaner to avoid ingesting any residue.
- Brush (Optional): Some people like to give it a quick brush after soaking, especially if there’s any visible debris.
Caution: Ensure the denture cleaner is safe for night guards. Some strong formulas might be too harsh for certain materials. If unsure, stick to gentler methods or specialized night guard cleaners.
Disinfecting Your Night Guard with Hydrogen Peroxide
If you’re looking to disinfect night guard, hydrogen peroxide is a readily available and effective option. It kills bacteria and can help whiten the guard.
How to Disinfect with Hydrogen Peroxide:
- Prepare the Solution: Mix one part 3% hydrogen peroxide with one part lukewarm water.
- Soak the Night Guard: Submerge your night guard in the hydrogen peroxide and water mixture.
- Soaking Time: Let it soak night guard for about 10-15 minutes. Do not leave it for longer, as prolonged exposure to hydrogen peroxide can potentially weaken the material.
- Brush and Rinse: After soaking, gently brush the night guard with your soft-bristled toothbrush. Rinse it thoroughly under lukewarm running water to remove all traces of peroxide.
- Important: Never ingest hydrogen peroxide. Ensure thorough rinsing.
Specialized Night Guard Cleaning Solutions
There are many commercial night guard cleaning solution products available. These are often the safest and most effective option as they are specifically formulated for the materials used in night guards.
Benefits of Specialized Cleaners:
- Gentle Yet Effective: Formulated to clean without damaging the material.
- Deodorizing Properties: Many neutralize odors effectively.
- Antimicrobial Action: Designed to kill bacteria and fungi.
- Stain Removal: Can help lift discoloration.
How to Use:
- Follow Instructions: Always adhere to the manufacturer’s instructions on the product packaging.
- Typically Soaking: Most involve dissolving a tablet or using a liquid solution for soaking.
- Rinse Well: Crucially, rinse your night guard thoroughly with lukewarm water after using any cleaning solution.
What NOT To Do When Cleaning Your Night Guard
While the goal is effective cleaning, some common cleaning mistakes can damage your night guard or be ineffective.
- Never Use Hot Water: Hot water can warp or melt the acrylic or thermoplastic material of your night guard, making it ill-fitting and useless. Always use lukewarm or cool water.
- Avoid Abrasive Cleaners or Toothpastes: Harsh scrubbing agents, abrasive powders, or whitening toothpastes can scratch the surface of your night guard. Scratches can harbor bacteria and lead to discoloration.
- Don’t Use Mouthwash for Cleaning: Many mouthwashes contain alcohol or other chemicals that can damage the night guard material over time. Some also contain dyes that can stain the guard. While some dentists might recommend a quick rinse with diluted mouthwash after cleaning and rinsing, it should never be used as a primary cleaning agent or soaking solution.
- Avoid Harsh Chemicals: Bleach, alcohol-based solutions (other than diluted peroxide as specified), or strong household cleaners can degrade the material and are unsafe for oral use.
- Don’t Boil Your Night Guard: Boiling will instantly warp and destroy your night guard.
- Don’t Ignore Odors: If your night guard consistently develops odors despite cleaning, it might indicate an underlying issue with your oral hygiene or the guard itself. Consult your dentist.
Storing Your Night Guard Properly
Proper storage is as important as cleaning for maintaining hygiene and preventing damage.
- Use a Clean, Ventilated Case: Always store your night guard in its designated clean case. Ensure the case has ventilation holes to allow the guard to air dry.
- Dry Before Storing: Never place a wet night guard into its case. This creates a moist environment perfect for bacterial growth. Let it air dry completely.
- Keep Away from Heat and Direct Sunlight: Prolonged exposure to heat or direct sunlight can warp the material.
Troubleshooting Common Night Guard Issues
Here are some common problems and how to address them with proper cleaning:
| Problem | Cause | Solution |
|---|---|---|
| Bad Odor | Bacterial buildup, trapped saliva, inadequate cleaning. | Daily night guard cleaning with soap and water. Weekly soak in denture cleaner for night guard, white vinegar solution, or hydrogen peroxide night guard solution. Ensure thorough rinsing and air drying. Consider baking soda night guard cleaning for extra deodorizing. |
| Yellowing or Stains | Coffee, tea, wine, tobacco, or insufficient cleaning. | Regular brushing. Try soaking in a denture cleaner for night guard or a specialized night guard cleaning solution. A mild solution of baking soda night guard cleaning can also help lift stains. If stains persist, consult your dentist. |
| Gritty Feeling | Incomplete rinsing of cleaning agents or toothpaste. | Rinse your night guard meticulously under lukewarm water after every cleaning. Ensure no residue from baking soda, denture cleaner, or toothpaste remains. |
| Sticky Residue | Plaque or biofilm buildup. | Thorough daily cleaning with a soft brush and mild soap. A weekly soak in a night guard cleaning solution or denture cleaner for night guard is recommended. |
| Warping | Exposure to heat (hot water, dishwasher, car dashboard). | Prevention is key. Always use lukewarm or cool water. Never use hot water, a dishwasher, or leave your guard in hot environments. If warping is minor, some dentists might be able to adjust it, but often a new guard is necessary. |
When to Consult Your Dentist
While home cleaning is effective, there are times when professional advice is needed:
- Persistent Odors/Stains: If your night guard continues to smell or stain despite regular and deep cleaning, there might be an issue with the guard material or your oral health.
- Damage or Warping: If your night guard is cracked, chipped, or warped, it needs to be assessed or replaced by your dentist.
- Changes in Fit: If your night guard no longer fits comfortably or securely, it could be due to material degradation or changes in your bite, requiring a dental check-up.
- Oral Health Concerns: If you experience persistent bad breath, gum irritation, or any other oral health issues, consult your dentist to rule out any problems related to your night guard or overall oral hygiene.
Frequently Asked Questions (FAQ)
Q1: How often should I clean my night guard?
A1: You should perform daily night guard cleaning by rinsing and brushing it. A deeper clean using soaking solutions (like denture cleaner for night guard or a specialized night guard cleaning solution) should be done at least weekly.
Q2: Can I use toothpaste to clean my night guard?
A2: Yes, but only use a non-abrasive toothpaste. Avoid whitening toothpastes or those with gritty particles, as they can scratch the night guard. Mild dish soap or a specialized cleaner is often preferred.
Q3: Is it safe to soak my night guard in mouthwash?
A3: It’s generally not recommended. Many mouthwashes contain alcohol and other ingredients that can damage the material of your night guard over time. It can also leave an unpleasant taste.
Q4: My night guard has a slight odor. What’s the best way to remove it?
A4: For odor removal, try a weekly soak in a denture cleaner for night guard, a solution of white vinegar and water, or a baking soda night guard cleaning paste or soak. Ensuring it is completely dry before storage is also vital.
Q5: Can I use bleach to clean my night guard?
A5: Absolutely not. Bleach is a harsh chemical that will damage the material of your night guard and is unsafe for oral use.
Q6: What is the best way to clean night guard materials like acrylic or EVA?
A6: For most materials, gentle brushing with mild soap and lukewarm water is best for daily cleaning. For deeper cleaning, consider a specialized night guard cleaning solution or soaking in a diluted denture cleaner for night guard. Always check the manufacturer’s recommendations if available.
Q7: How do I disinfect night guard if I’m worried about bacteria?
A7: A weekly soak in a 3% hydrogen peroxide night guard solution (diluted with equal parts water) for 10-15 minutes is an effective way to disinfect your night guard. Always rinse thoroughly afterward.
Q8: Are there any homemade solutions that work well for cleaning?
A8: Yes, the most effective homemade options include using diluted white vinegar or a paste made from baking soda night guard cleaning. Both are natural disinfectants and deodorizers.
By implementing these cleaning strategies, you can ensure your night guard remains hygienic, comfortable, and effective, protecting your smile for years to come. Remember, consistent care is key to the longevity and performance of your custom dental appliance.