
Can you build a garden bench from scratch? Yes, you absolutely can build a garden bench from scratch with the right plans and a few basic tools! This guide will walk you through how to build a DIY garden bench that will enhance your outdoor space. We’ll cover everything from choosing your materials to the final touches, making it one of your favorite woodworking projects for garden enjoyment. Whether you’re looking for simple bench construction or a more elaborate patio bench design, these outdoor bench plans will help you build your own bench with confidence.
Creating a beautiful and functional garden bench doesn’t require advanced woodworking skills. With a good set of plans and a willingness to learn, you can easily build a sturdy and attractive piece of garden furniture. This guide is designed to be a straightforward resource for anyone wanting to tackle a woodworking bench project, providing clear steps and helpful tips. Let’s get started on creating your perfect backyard seating ideas.
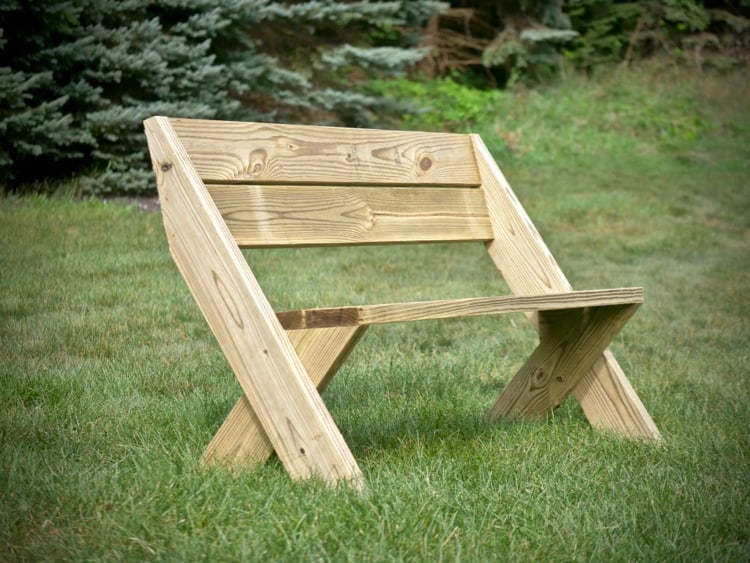
Image Source: rogueengineer.com
Gathering Your Materials and Tools
Before you start cutting wood, it’s essential to have all your materials and tools ready. This preparation will make the building process much smoother. For a solid and durable garden bench, choosing the right wood is crucial. Look for weather-resistant lumber like cedar, redwood, or pressure-treated pine. These woods will stand up well to sun, rain, and temperature changes.
Essential Lumber
For a standard 4-foot garden bench, you’ll typically need:
- Legs: (4) pieces of 4×4 lumber, each about 16-18 inches long.
- Seat Supports: (2) pieces of 2×4 lumber, each about 48 inches long.
- Seat Slats: (5-6) pieces of 1×4 or 1×6 lumber, each about 48 inches long.
- Back Supports: (2) pieces of 2×4 lumber, each about 36 inches long.
- Back Slats: (4-5) pieces of 1×4 or 1×6 lumber, each about 48 inches long.
It’s always a good idea to buy a little extra lumber in case of any mistakes or for future repairs. You can often find free bench blueprints online that will give you exact measurements for a specific design.
Fasteners and Hardware
- Wood Screws: Use exterior-grade wood screws that are rust-resistant. For joining 4x4s to 2x4s, 3-inch screws are usually good. For attaching slats, 1.5-inch or 2-inch screws will work well.
- Wood Glue: An exterior-grade wood glue will add extra strength to your joints.
- Sandpaper: Various grits (e.g., 80, 120, 220) for smoothing the wood.
- Wood Finish: Exterior-grade paint, stain, or sealant to protect the wood and enhance its appearance.
Tools You’ll Need
- Measuring Tape: For accurate measurements.
- Pencil: For marking cuts and assembly points.
- Saw: A miter saw or circular saw is best for making straight cuts. A handsaw can work for smaller projects, but it’s more labor-intensive.
- Drill/Driver: With drill bits for pilot holes and screw bits for driving screws.
- Clamps: To hold pieces together while glue dries or while you’re screwing them.
- Sander: An orbital sander or sanding block to smooth the wood.
- Safety Glasses: Always protect your eyes when working with tools.
- Work Gloves: To protect your hands.
Step-by-Step Assembly: Building Your DIY Garden Bench
These plans are for a classic, sturdy garden bench. This simple bench construction is achievable for most DIY enthusiasts.
Step 1: Cutting Your Lumber
Accuracy in cutting is key to a well-built bench. Double-check your measurements before making each cut.
- Legs: Cut your 4x4s to the desired height for your bench legs. A typical seat height is around 18 inches. So, you’ll cut four pieces of 4×4 lumber to 18 inches each.
- Seat Supports: Cut two pieces of 2×4 lumber to 48 inches for the front and back seat supports.
- Back Supports: Cut two pieces of 2×4 lumber to approximately 36 inches. These will angle to support the backrest. You might want to cut these a bit longer initially and then trim to your preferred angle later.
- Seat Slats: Cut your 1×4 or 1×6 lumber into five or six pieces, each 48 inches long.
- Back Slats: Cut your 1×4 or 1×6 lumber into four or five pieces, each 48 inches long.
Tip: If you’re using a miter saw, you can set it to a slight angle (around 10-15 degrees) for the tops of the legs where they’ll meet the seat supports, creating a slightly more finished look and better joinery.
Step 2: Assembling the Bench Legs and Seat Supports
This is where the main frame of your bench starts to take shape.
- Attach Seat Supports to Legs: Lay two of the 4×4 legs flat on your work surface, parallel to each other. Place one of the 2×4 seat supports on top of the legs, flush with the outer edges. Position it about 1-2 inches from the top of the legs.
- Drill Pilot Holes: Drill pilot holes through the 2×4 support and into the 4×4 legs. This prevents the wood from splitting.
- Secure with Screws and Glue: Apply wood glue to the contact surfaces, then drive two exterior-grade screws through the 2×4 and into each leg.
- Repeat for the Other Side: Do the same for the other set of legs and the second 2×4 seat support. You should now have two “U” shaped assemblies.
- Connect the Assemblies: Stand up both “U” assemblies. Place the remaining two 2×4 seat supports between them, flush with the outer edges, about 1-2 inches from the top of the legs. Ensure the entire frame is square.
- Drill and Screw: Drill pilot holes and secure these connecting supports with wood glue and screws, driving them through the supports and into the legs. You should now have a rectangular base with legs.
Table 1: Leg and Seat Support Dimensions
| Component | Lumber Size | Quantity | Length |
|---|---|---|---|
| Legs | 4×4 | 4 | 18 inches |
| Seat Supports | 2×4 | 4 | 48 inches |
Step 3: Attaching the Seat Slats
This step will create the seating surface of your garden bench.
- Position First Slat: Take one of your 48-inch 1×4 or 1×6 slats. Place it on top of the assembled frame, flush with the front edge of the seat supports.
- Spacing: You’ll want to space your slats slightly apart to allow for drainage and wood expansion. A good spacing is about 1/2 inch to 3/4 inch. You can use a scrap piece of wood as a spacer.
- Drill Pilot Holes: Drill pilot holes through the slat and into the 2×4 seat supports below.
- Secure with Screws: Apply a bit of wood glue to the contact points, then drive two screws through the slat into each of the front and back seat supports.
- Continue Attaching Slats: Work your way down the bench, using your spacer to maintain consistent gaps between the slats. Secure each slat with glue and screws. Ensure the last slat is flush with the back edge of the seat supports.
Step 4: Attaching the Back Supports
Now, let’s add the structure for the backrest.
- Angle the Back Supports: Take your two 2×4 back supports (initially cut a bit longer). Place them against the back seat supports, angling them backward to create the backrest. A comfortable angle is typically around 10-15 degrees from vertical. You can use a protractor or set your miter saw to achieve this angle. Mark the cut line on the 2x4s where they meet the seat support at the desired angle. Cut these pieces.
- Attach to Seat Supports: Position the angled back supports so their bottom ends are flush with the back edge of the back seat support. They should angle upwards and back.
- Drill and Screw: Drill pilot holes and secure the back supports to the back seat supports using wood glue and screws. Ensure they are positioned symmetrically.
Step 5: Attaching the Back Slats
This step completes the backrest of your bench.
- Position First Slat: Place one of your 48-inch back slats against the angled back supports. It should be flush with the top of the back supports.
- Spacing: Similar to the seat slats, leave a small gap (about 1/2 inch) between the back slats.
- Drill Pilot Holes and Screw: Drill pilot holes through the back slat and into the angled back supports. Secure with wood glue and screws.
- Continue Attaching Slats: Work your way down the backrest, using your spacer to keep the gaps consistent. Secure each slat with glue and screws.
Table 2: Lumber Cutting Summary (Example for 4-foot Bench)
| Component | Lumber Size | Quantity | Cut Length | Notes |
|---|---|---|---|---|
| Legs | 4×4 | 4 | 18 inches | |
| Seat Supports | 2×4 | 4 | 48 inches | |
| Seat Slats | 1×4/1×6 | 5-6 | 48 inches | Space approx. 1/2″ – 3/4″ apart |
| Back Supports | 2×4 | 2 | ~36 inches | Cut with ~10-15 degree angle at top |
| Back Slats | 1×4/1×6 | 4-5 | 48 inches | Space approx. 1/2″ apart, flush at top |
Finishing Touches for Your Garden Furniture Plans
Once the main construction is complete, it’s time to make your bench look great and last longer.
Step 6: Sanding
This is a crucial step for comfort and appearance.
- Start with Coarse Grit: Begin sanding with 80-grit sandpaper to remove any rough edges, splinters, or saw marks. Pay close attention to the edges of the seat and backrest for a smooth feel.
- Move to Medium Grit: Progress to 120-grit sandpaper for a smoother finish.
- Finish with Fine Grit: For a really smooth, polished look, finish with 220-grit sandpaper.
- Clean Off Dust: After sanding, use a tack cloth or a slightly damp rag to wipe away all the dust.
Step 7: Applying Wood Finish
Protecting your bench from the elements is essential for its longevity.
- Stain: If you want to enhance the natural beauty of the wood, apply an exterior-grade stain. Follow the manufacturer’s instructions for application and drying times.
- Sealant/Varnish: A clear sealant or exterior varnish will provide excellent protection against moisture and UV rays. Apply multiple thin coats for best results.
- Paint: If you prefer a pop of color, an exterior-grade paint is a great option. Ensure you use a good primer for better adhesion and durability.
Tip: Apply your finish in a well-ventilated area, away from direct sunlight and dust.
Customizing Your Patio Bench Design
These basic outdoor bench plans can be adapted to fit your style and needs.
Varying the Size
You can easily adjust the length of the seat and back slats, as well as the height of the legs, to create a bench for two or a longer seating area for more people. When changing the length, ensure you maintain the structural integrity by adding an extra set of legs or support braces if needed.
Adding Armrests
For a more comfortable and finished look, you can add armrests. This usually involves adding vertical 4×4 posts at the ends of the bench, extending upwards from the legs, and then attaching horizontal 2×4 or 1×4 pieces to these posts.
Decorative Touches
- Beveling Edges: Consider beveling the edges of the seat and back slats for a softer, more finished appearance.
- Curved Backrest: For a more ergonomic design, you can cut the back slats with a slight curve.
- Decorative Brackets: Add metal or wooden decorative brackets to the corners for added style and support.
These modifications can transform a simple bench into a truly unique piece of garden furniture. Exploring different patio bench designs online can provide endless inspiration.
Tips for Success with Your Woodworking Bench Project
- Measure Twice, Cut Once: This old adage is crucial in woodworking.
- Pre-Drill Pilot Holes: Always drill pilot holes, especially when working with harder woods or near the ends of boards, to prevent splitting.
- Use the Right Screws: Exterior-grade, rust-resistant screws are a must for outdoor projects.
- Check for Squareness: Use a carpenter’s square to ensure your frame is perfectly square before attaching slats.
- Level Surface: Build on a flat, level surface for the most accurate assembly.
- Safety First: Always wear safety glasses and consider gloves when handling wood.
Frequently Asked Questions (FAQ)
Q1: What is the best type of wood for an outdoor garden bench?
A1: Cedar, redwood, and pressure-treated pine are excellent choices due to their natural resistance to rot, decay, and insects. Teak is also a premium option but is more expensive.
Q2: Can I use reclaimed wood for my garden bench?
A2: Yes, you can, but ensure the reclaimed wood is still structurally sound and has been treated or sealed appropriately to withstand outdoor conditions. Remove any old nails or screws carefully.
Q3: How do I protect my wooden bench from the weather?
A3: Regular application of exterior-grade stains, sealants, or paints will protect your bench. Cleaning it periodically and storing it under a cover during harsh winter months can also extend its lifespan.
Q4: What is a good height for a garden bench?
A4: A standard seat height for a garden bench is typically between 16 and 18 inches from the ground.
Q5: How wide should the gaps be between the seat slats?
A5: A gap of about 1/2 inch to 3/4 inch is generally recommended. This allows for water drainage and accommodates wood expansion and contraction due to changes in humidity.
Q6: How can I make my DIY garden bench last longer?
A6: Proper wood selection, meticulous construction with good joinery, regular maintenance with protective finishes, and protecting it from extreme weather conditions will ensure your bench lasts for many years.
Building your own bench is a rewarding woodworking bench project that adds charm and functionality to your garden. With these detailed plans and tips, you’re well on your way to creating beautiful backyard seating ideas that you can enjoy for years to come. These free bench blueprints and simple bench construction methods make it accessible for everyone to enjoy the satisfaction of creating their own garden furniture. Happy building!