
Can you do a wheel alignment at home? While it’s possible to perform some basic checks and adjustments at home, achieving a precise vehicle alignment without specialized equipment and knowledge is extremely difficult and generally not recommended for optimal tire alignment. A proper wheel alignment involves highly technical adjustments to your car’s suspension.
Getting your wheels aligned correctly is vital for your car’s performance, safety, and the longevity of your tires. When your wheels are out of alignment, it can lead to uneven tire wear, poor handling, and even affect your car’s fuel efficiency. Many car owners wonder if they can save money and hassle by performing a wheel alignment at home, or if a home alignment service is a viable alternative to a professional garage alignment. Let’s dive deep into what’s involved and what you can realistically achieve yourself.
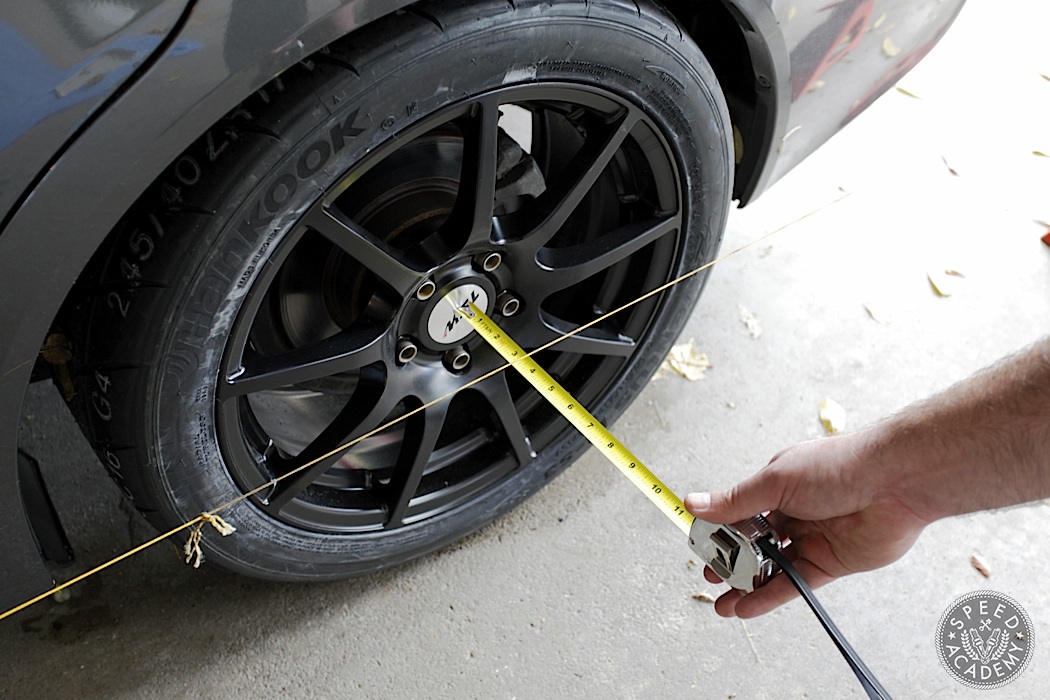
Image Source: speed.academy
The Mechanics of Vehicle Alignment
Before we talk about DIY, let’s get a grasp on what a car wheel adjustment actually entails. Vehicle alignment is about adjusting the angles of the wheels so they are set to your car manufacturer’s specifications. These angles affect how your tires interact with the road. The main angles involved are:
-
Camber: This is the inward or outward tilt of the top of the tire when viewed from the front of the car.
- Positive Camber: The top of the tire tilts outward.
- Negative Camber: The top of the tire tilts inward.
- Zero Camber: The tire is perfectly vertical.
-
Caster: This is the angle of the steering axis when viewed from the side. It affects steering stability and how the steering wheel returns to center after a turn.
- Positive Caster: The steering axis tilts backward. This helps the wheels self-center and improves straight-line stability.
- Negative Caster: The steering axis tilts forward. This is less common and can make steering feel lighter but less stable.
- Zero Caster: The steering axis is perpendicular to the ground.
-
Toe: This refers to the direction your tires are pointing. It’s measured in degrees or fractions of an inch.
- Toe-in: The front edges of the tires are closer together than the rear edges.
- Toe-out: The front edges of the tires are farther apart than the rear edges.
- Zero Toe: The tires are pointing perfectly straight ahead.
-
Thrust Angle: This is the angle of the rear axle relative to the car’s centerline. If the thrust angle is off, the car will feel like it’s trying to go sideways.
Why Professional Alignment is Crucial
Modern cars often have complex suspension systems, especially those with independent rear suspensions or advanced electronic stability controls. These systems require precise adjustments that are difficult to achieve without specialized equipment.
- Advanced Alignment Racks: Professional shops use laser-guided or camera-based alignment racks that measure all the angles with extreme accuracy.
- Manufacturer Specifications: Each car model has specific alignment specifications that need to be met. These are often very narrow ranges.
- Multiple Adjustment Points: Adjusting one angle can sometimes affect another. A professional technician is trained to account for these interactions and make necessary corrections.
- Specialized Tools: Specific tools are needed to accurately measure and adjust camber, caster, and toe. Trying to do this with household tools is often impossible.
Can You Do Some Basic Checks at Home?
While a full wheel alignment is best left to the pros, there are some things you can check at home to see if your alignment might be off. These aren’t adjustments, but rather indicators.
Signs Your Car Needs an Alignment
Recognizing these signs can help you decide when it’s time to visit a professional mechanic.
-
Uneven Tire Wear: This is one of the most common signs.
- Feathering: The tread blocks are worn on one edge and sharp on the other. This often indicates a toe-in toe-out issue.
- Cupping or Scalloping: Circular wear patterns on the tire. This can be caused by a camber adjustment problem or worn suspension components.
- Wear on the Inside or Outside Edge: Excessive wear on the inside or outside edge of the tire usually points to a camber adjustment issue.
-
Car Pulling to One Side: If your car consistently drifts to the left or right when you’re driving on a straight, level road, it’s a strong indicator of an alignment problem.
- Steering Wheel Off-Center: Even when you’re driving straight, if your steering wheel is crooked, your alignment is likely off.
- Squealing Tires: Tires that squeal during normal turns, especially at low speeds, might be scrubbing due to misalignment.
- Loose or Wandering Steering: If the steering feels vague, or you have to constantly make small steering corrections to keep the car going straight, it could be an alignment issue.
DIY Wheel Alignment: What You Might Be Able to Do
If you’re determined to try a DIY wheel alignment, you’re primarily looking at adjusting the toe-in toe-out settings. Adjusting camber and caster at home is significantly more complex and often requires specialized knowledge and equipment.
Essential DIY Alignment Tools
To even attempt a basic home alignment service, you’ll need a few key alignment tools:
- Measuring Tape: A good quality, long measuring tape (at least 5-10 feet).
- String or Laser Alignment Kit: These kits use taut strings or lasers to create parallel lines, helping you measure toe.
- Wrenches and Socket Set: You’ll need these to loosen and tighten tie rod ends and other suspension components.
- Safety Equipment: Jack stands, wheel chocks, gloves, and eye protection are crucial.
- Level Surface: You absolutely need a flat, level surface to perform any measurements.
Step-by-Step Guide to a Basic DIY Toe Adjustment
This guide is for adjusting the toe-in toe-out setting only. Again, this is a very basic approximation and not a substitute for a professional alignment.
Safety First!
- Park your car on a flat, level surface.
- Engage the parking brake firmly.
- Place wheel chocks behind the rear wheels.
- If you need to lift the vehicle, use jack stands to support it securely. Never work under a car supported only by a jack.
Measuring Toe with String or Laser Kits
- Prepare the Car: Ensure your tires are properly inflated to the recommended pressure. Remove any loose items from the car that might affect suspension.
- Set Up the Measuring System:
- String Method: You’ll need two sturdy posts or stands placed in front of and behind the car. Run a taut string from each side, parallel to the car’s centerline. Position the strings so they just touch the outer sidewalls of the front tires. You’ll want the strings to be the same height and width apart on both ends. Some kits come with specific gauges to help with this.
- Laser Method: Laser alignment kits use lasers mounted on the wheels or the vehicle to project lines. Follow the kit’s specific instructions for setting up the lasers. These are generally more accurate than string methods.
- Measure Toe:
- Front of Tires: Measure the distance between the strings (or laser lines) at the front of the tires. Make sure you measure at the same height on both tires.
- Rear of Tires: Measure the distance between the strings (or laser lines) at the rear of the tires. Again, measure at the same height.
Interpreting Your Measurements:
- Toe-in: If the measurement at the front of the tires is less than the measurement at the rear, you have toe-in.
- Toe-out: If the measurement at the front of the tires is greater than the measurement at the rear, you have toe-out.
- Zero Toe: If the measurements are the same, you have zero toe.
Adjusting the Tie Rods
The tie rods connect the steering rack to the steering knuckle, and they are what you adjust to change the toe.
- Locate the Tie Rods: Find the tie rods connected to your front wheels. You’ll see a rubber boot covering the inner and outer tie rod ends.
- Loosen the Lock Nut: Each tie rod has a lock nut that secures the adjustment sleeve. You’ll need to loosen this nut.
- Adjust the Tie Rod:
- To increase toe-in (or decrease toe-out), you need to lengthen the tie rod. Turn the adjustment sleeve counter-clockwise (away from the tie rod end).
- To decrease toe-in (or increase toe-out), you need to shorten the tie rod. Turn the adjustment sleeve clockwise (towards the tie rod end).
- Important: Make small adjustments. Turn the sleeve by fractions of a turn (e.g., 1/8 or 1/4 turn) at a time.
- Tighten the Lock Nut: Once you’ve made an adjustment, re-tighten the lock nut securely.
- Re-measure: After each adjustment, repeat the measurement process with your string or laser kit. Your goal is to get the measurements as close as possible to your car’s specified toe setting. Consult your car’s manual or an online resource for the correct specifications.
Crucial Considerations for DIY Toe Adjustment:
- Symmetry: Ensure you make equal adjustments on both sides to maintain steering wheel centering. If you turn one side 1/4 turn clockwise, turn the other side 1/4 turn clockwise as well.
- Steering Wheel Position: After adjustments, the steering wheel might be off-center. You’ll need to make symmetrical adjustments to correct this.
- Tightness: Ensure all nuts are tightened properly. Loose components can be dangerous.
Why Most DIY Alignments Fall Short
Even with the best intentions and the right tools, achieving a truly accurate vehicle alignment at home is incredibly challenging. Here’s why:
- Lack of Precision: String or laser kits, while useful for a basic check, don’t offer the pinpoint accuracy of professional equipment. They can be affected by slight imperfections in the surface, wind, or the car’s own weight distribution.
- Measuring Camber and Caster: As mentioned, camber and caster adjustments are much more complex. They involve shims, eccentric bolts, and precise measurements that are nearly impossible to get right without specialized equipment and a lift. Incorrect camber or caster can lead to serious handling issues and rapid tire wear.
- Suspension Sag: When a car is on a flat surface, the suspension can still be under some load. Professional alignment machines account for this, often using special rolling bridges or lifts to simulate driving conditions.
- Hidden Problems: You might not be able to see or feel worn ball joints, bushings, or other suspension components that are critical for a proper alignment. These issues need to be diagnosed and repaired by a professional before an alignment can be performed correctly.
- Ride Height: Ride height can significantly impact alignment angles. If you have adjustable suspension or recently changed springs, this needs to be accounted for, which is difficult in a DIY setting.
The Alternative: Professional Garage Alignment
When you take your car to a garage alignment service, you’re paying for accuracy, expertise, and specialized equipment.
What Happens During a Professional Alignment:
- Pre-Alignment Inspection: A technician will first inspect your suspension and steering components for any wear or damage. They’ll check for loose parts, worn bushings, and damaged tie rods. If they find problems, they’ll recommend repairs before proceeding with the alignment.
- Measuring All Angles: Using advanced alignment equipment (e.g., Hunter, John Bean systems), they’ll measure all the critical angles: camber, caster, toe, thrust angle, and set-back.
- Adjusting to Specs: Based on the manufacturer’s specifications for your specific vehicle, the technician will make precise adjustments to the tie rods, control arms, and other suspension components.
- Post-Alignment Check: After adjustments, they’ll re-measure everything to ensure it’s within the manufacturer’s tolerance.
- Test Drive: Many shops will take the car for a short test drive to confirm the steering is centered and the car tracks straight.
Cost vs. Benefit:
While a professional alignment can cost anywhere from $75 to $200 or more depending on your location and vehicle, the benefits often outweigh the cost.
- Extended Tire Life: Proper alignment can prevent premature tire wear, saving you money on replacement tires in the long run.
- Improved Fuel Efficiency: Misaligned wheels can create drag, negatively impacting your gas mileage.
- Safer Driving: A car that handles predictably and tracks straight is much safer to drive.
- Smoother Ride: Correct alignment contributes to a more comfortable driving experience.
Frequently Asked Questions About Home Wheel Alignment
Here are some common questions people have about trying to do their own wheel alignment:
Q1: Can I really do a wheel alignment at home with just a tape measure?
A1: You can perform a very basic toe-in toe-out measurement and make crude adjustments with a tape measure and strings, but it will not be accurate enough for a proper vehicle alignment. Factors like the flatness of your garage floor, the exact positioning of the strings, and the inherent slop in suspension components make achieving precise angles nearly impossible with just basic tools.
Q2: How often should I get my wheels aligned?
A2: It’s generally recommended to get your tire alignment checked annually, or whenever you notice signs of uneven tire wear, your car pulls to one side, or after hitting a significant pothole or curb. Many tire shops offer free alignment checks.
Q3: My steering wheel is crooked, but the car drives straight. Does it need an alignment?
A3: A crooked steering wheel is a definite sign that your car wheel adjustment is off, even if the car drives straight. This is usually a toe adjustment issue that needs to be corrected to ensure even tire wear and proper steering.
Q4: What’s the difference between a DIY alignment and a professional garage alignment?
A4: A DIY wheel alignment, if attempted for toe, is a basic approximation. A garage alignment service uses highly accurate, calibrated equipment to measure and adjust all critical angles (camber, caster, toe) to precise manufacturer specifications. Professionals also have the expertise to diagnose and repair underlying suspension issues that affect alignment.
Q5: Is it dangerous to perform a DIY wheel alignment?
A5: While adjusting toe isn’t inherently dangerous if done carefully with proper safety precautions (jack stands, wheel chocks), inaccurate adjustments can lead to poor handling, uneven tire wear, and potentially unsafe driving conditions. Trying to adjust camber or caster without proper knowledge and equipment is significantly more risky.
Q6: What are the most common alignment issues a DIYer might try to fix?
A6: The most common issue a DIYer might attempt to adjust is toe-in toe-out. This is because toe is the easiest angle to measure and adjust using simple tools like string or laser kits and by turning the tie rod ends.
Q7: Can I adjust camber at home?
A7: Adjusting camber adjustment at home is extremely difficult and not recommended for most DIYers. It often involves specialized tools to adjust eccentric bolts or to add/remove shims in the suspension. Without precise measurements and the right equipment, you risk making the problem worse, leading to poor handling and excessive tire wear.
Q8: What if I hit a big pothole? Do I need an alignment?
A8: Hitting a significant pothole or curb can easily knock your wheels out of alignment. It’s a good idea to have your vehicle alignment checked after such an event, especially if you notice any changes in how your car handles or if your steering wheel is no longer centered.
Conclusion: When to DIY and When to Call the Pros
While the allure of a home alignment service might be tempting for saving money, the reality is that achieving a precise and safe vehicle alignment at home is exceptionally challenging. You can perform basic checks for toe-in toe-out and perhaps make minor adjustments, but for optimal results that ensure your car handles safely, tires wear evenly, and your vehicle performs as intended, a professional garage alignment is the best course of action.
Investing in a professional alignment means relying on trained technicians, advanced equipment, and accurate specifications. This ensures that all the angles – camber, caster, and toe – are adjusted correctly, providing the best performance and longevity for your tires and suspension system. Don’t compromise on safety and performance; when in doubt, consult a professional.